My friend got the idea of making her husband a yeti piñata for his birthday from something she saw on Pinterest. She asked me to help her recreate it, and of course I jumped at the opportunity. Piñatas are so much fun.
Before starting, I did my research and found the original piñata that my friend had seen. It was made by Marissa Land for a craft fair. You can see the original here. Full credit to Marissa for making such a cool piñata. Mine is a little different, but looks very close to Marissa’s original.
If you want to make your own yeti piñata, just follow my instructions below.
Materials:
- Flour
- Water
- Balloon
- Newspaper
- White Crepe Paper Streamers
- Scissors
- Hot Glue
- Construction Paper
- Strong Cord
Instructions:
1. The first step is to make the paper mache paste. Mix one part flour and two parts water. Stir it until it creates a paste. If needed, add more flour.
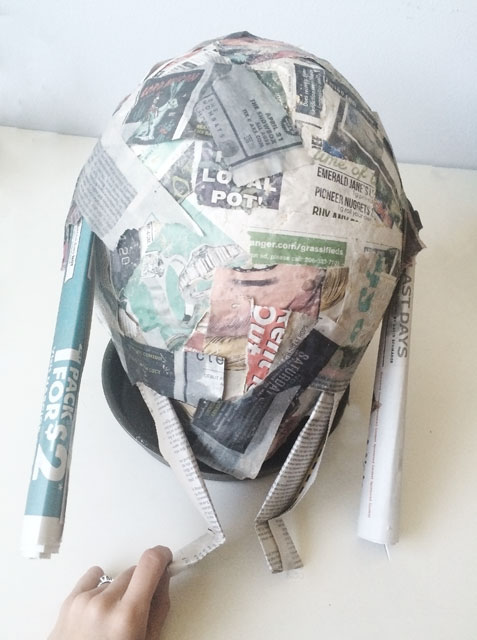
2. Inflate a round balloon. Place it in a pie tin to keep it from rolling around.
3. Cut newspaper into strips. Dip each strip in the paper mache paste and place it on the balloon. Work until the entire balloon is covered. Then let the newspaper dry.
4. Add two more layers of paper mache to the balloon, letting each layer dry in between applications. I started my first layer at night and let it dry overnight. In the morning, I completed my second layer before going to work. When I got home from work, I finished the third and final layer.
5. Make arms and legs by rolling up 4 sheets of newspaper. Using hot glue, affix the arms and legs to the balloon. It will end up looking sort of like a Thanksgiving turkey. To make sure the arms and legs stay attached, I suggest adding anther layer of paper mache over the joints.
6. Cut a small flap in the top of the piñata. This is where you will stuff the candy.
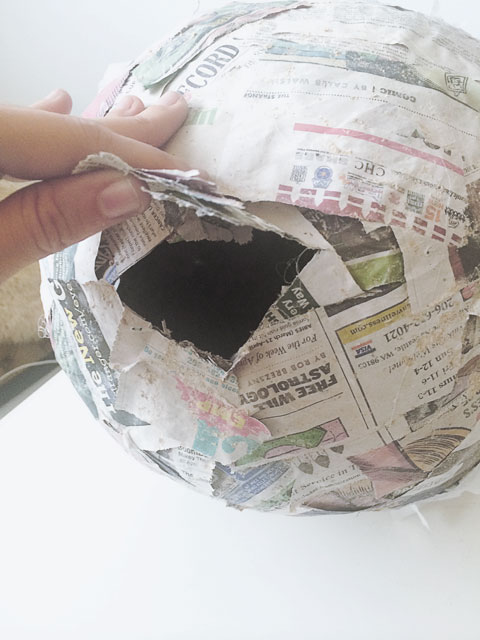
7. Poke 4 small holes in the top of the piñata and run strong cord through the holes. Make sure the cord is long enough for hanging.
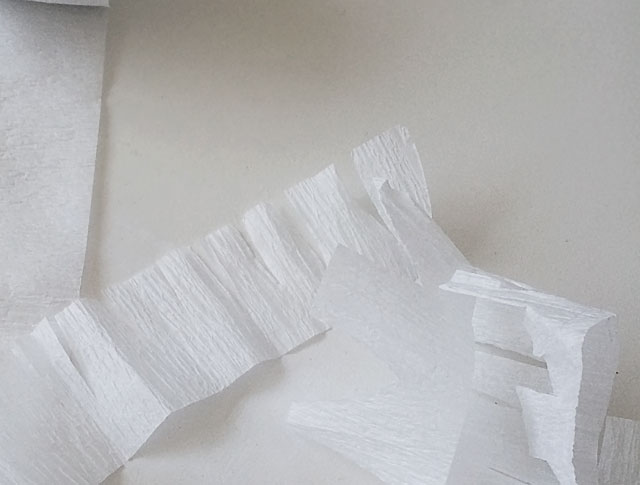
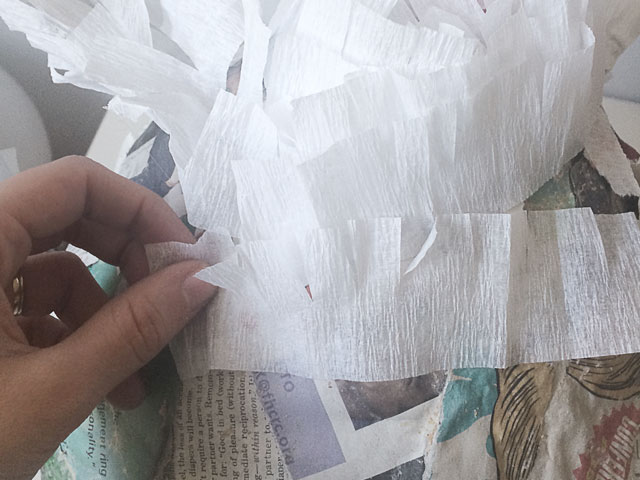
8. Now it’s time to decorate! Take the crepe paper streamer and begin making small fringed incisions. It’s best to unroll a long strand of the streamer, and then fold it over several times before making the cut. That way you can cut multiple incisions all at once.
9. Use a hot glue gun to glue the unfringed edge of the streamer to the paper mache body. Start with the arms and legs before moving from the bottom up. It’s easiest to turn the body upside down to glue the bottom half.
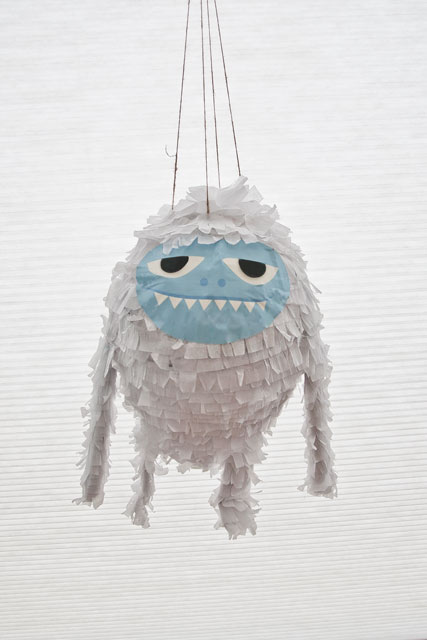
10. When you are almost at the top, stop and add your candy to the opening. Then finish by adding the fringe to the top of the head.
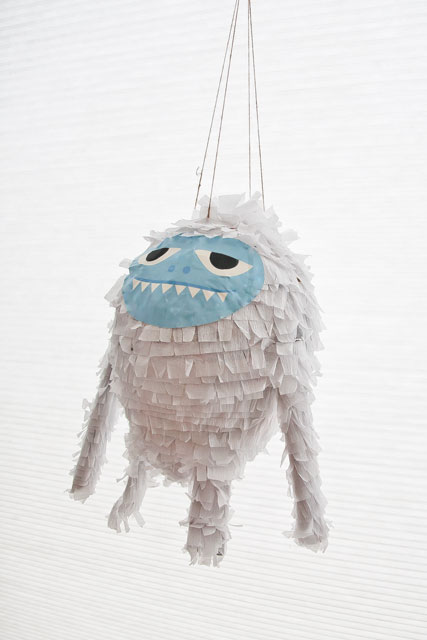
11. The last step is to make a face. Joey used Adobe Illustrator to create a cute face that we printed and glued to the piñata. If you aren’t lucky enough to have a graphic designer as a husband, don’t stress–you can easily make a face out of construction paper. You just need an oval for that face, circles for the eyes, and triangles for the teeth.

Isn’t he the cutest?!?

I love Mr. Yeti! In fact, I feel kind of sad that his head is going to get bashed in.
But I love candy, so Mr. Yeti is out of luck.
The face is amazing. You should upload a PNG file of the face that we could download if we wanted to make our own.