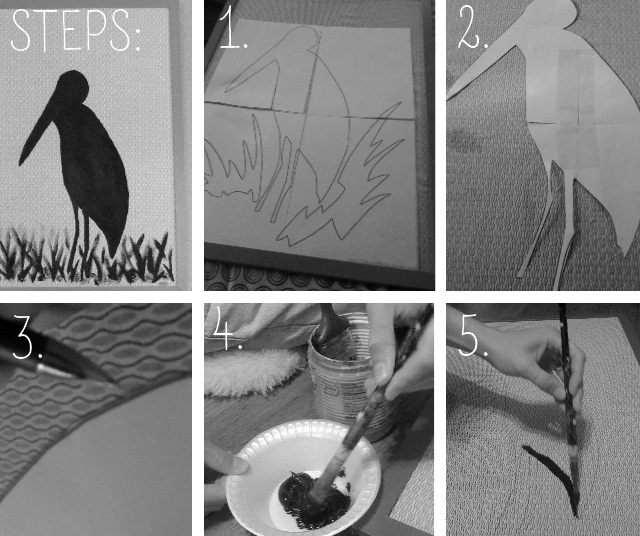
It may be odd, but I love animal silhouettes! A few weeks ago I did the deer silhouette art piece, and I had so much fun that I decided to give it another go. This time I made a stork silhouette. Storks are cute, right? And although my house is starting to remind me of a zoo, I am still very happy with the outcome of all my DIY stencil projects. For this stork painting, I used a blue Ikea frame from Value Village, a great textile from Goodwill Outlet, some acrylic paint, and a stencil from this website. I’m including the step by step instructions so you can create your own animal silhouette artwork. It is really simple, so you probably don’t need these directions, but just in case you are craft challenged, which sometimes I am, here you go.
Instructions:
- Print your stencil out. Since my frame is so large, I enlarged my stencil in Paint.net. You can use Photoshop or Gimpshop to do the same thing. I printed it out on to fit on 4 sheets of letter sized paper (see photo below) and taped them together to create the stork outline.
- Cut out the stencil.
- Trace the stencil’s outline on your fabric with a pen or pencil.
- Choose the paint color you want and pour it into a palette.
- Fill in the outline of the stencil with the paint. Joey added some grass to the bottom of our painting to create depth, but that is optional.

As a final step, I put the fabric in the frame and hung the finished product on our wall. It was super easy to make and looks great in our reading nook.

1 Comment on DIY Stork Art