This photo would be a whole lot more impressive if I had a before photo, but alas, I don’t. Usually that’s because I’m super impatient, which Joey can attest to, so when I decide to do something, I just do it, and typically forget about taking in progress / before photos. But in this instance, I truly did mean to take a before photo, but then our basement flooded and so there wasn’t a truly comparable before picture. There was just a lot of concrete and missing chunks of drywall. So you’ll just have to believe me, when I say that our basement bathroom used to be kind of depressing. It had dark brown vinyl tile, a boring rectangular mirror and the vanity top was my least favorite color of beige.
So in order to make the space less blah, but on a budget (because it’s not our main bathroom and we hadn’t planned on a bathroom upgrade), I did a few things:
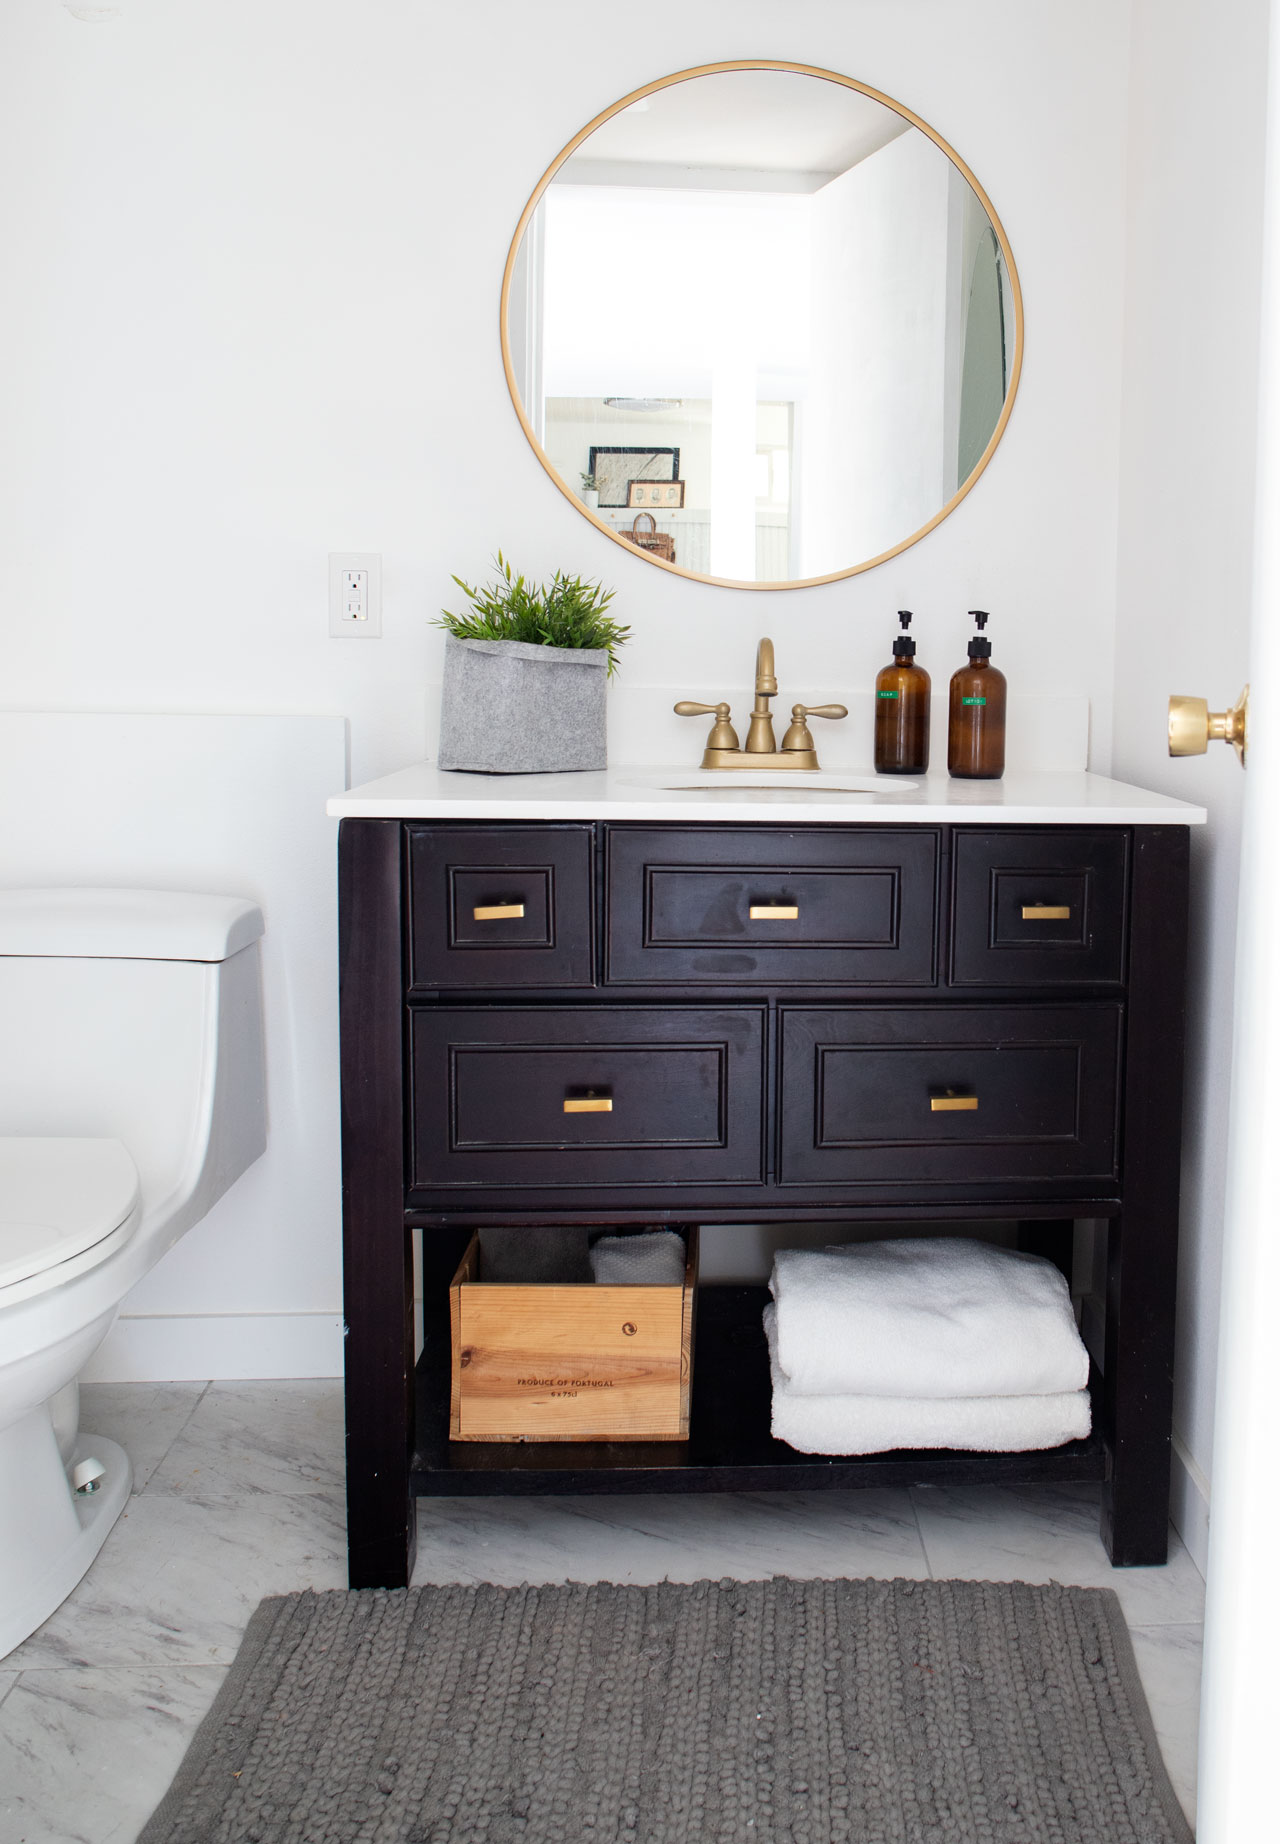
- I installed some faux marble vinyl tile. It was incredibly straightforward to install, and it looks way more luxe than it really is and it’s only $1.27 a square foot!
- I swapped out the hardware on the vanity for brass pulls and spray painted the faucet.
- I painted the vanity top white – yes, you heard that right. I painted it. Risky move, but I read a few tutorials and decided to go for it. It’s held up great, but it’s not our main bathroom, so it is rarely used. I’m not sure if I would recommend for a high traffic area.
- I replaced the rectangular mirror with a circular one. This was a bit of a splurge, but it’s totally worth it. Such a statement piece.
- I also added some fab accessories, like glass amber bottles for soap and lotion. I used our vintage label maker to add cute little labels.
This bathroom also has a small shower stall. I really wanted to replace it as well, but that wasn’t in our budget for now. Perhaps one day… for now, I’m really happy with the upgrades!