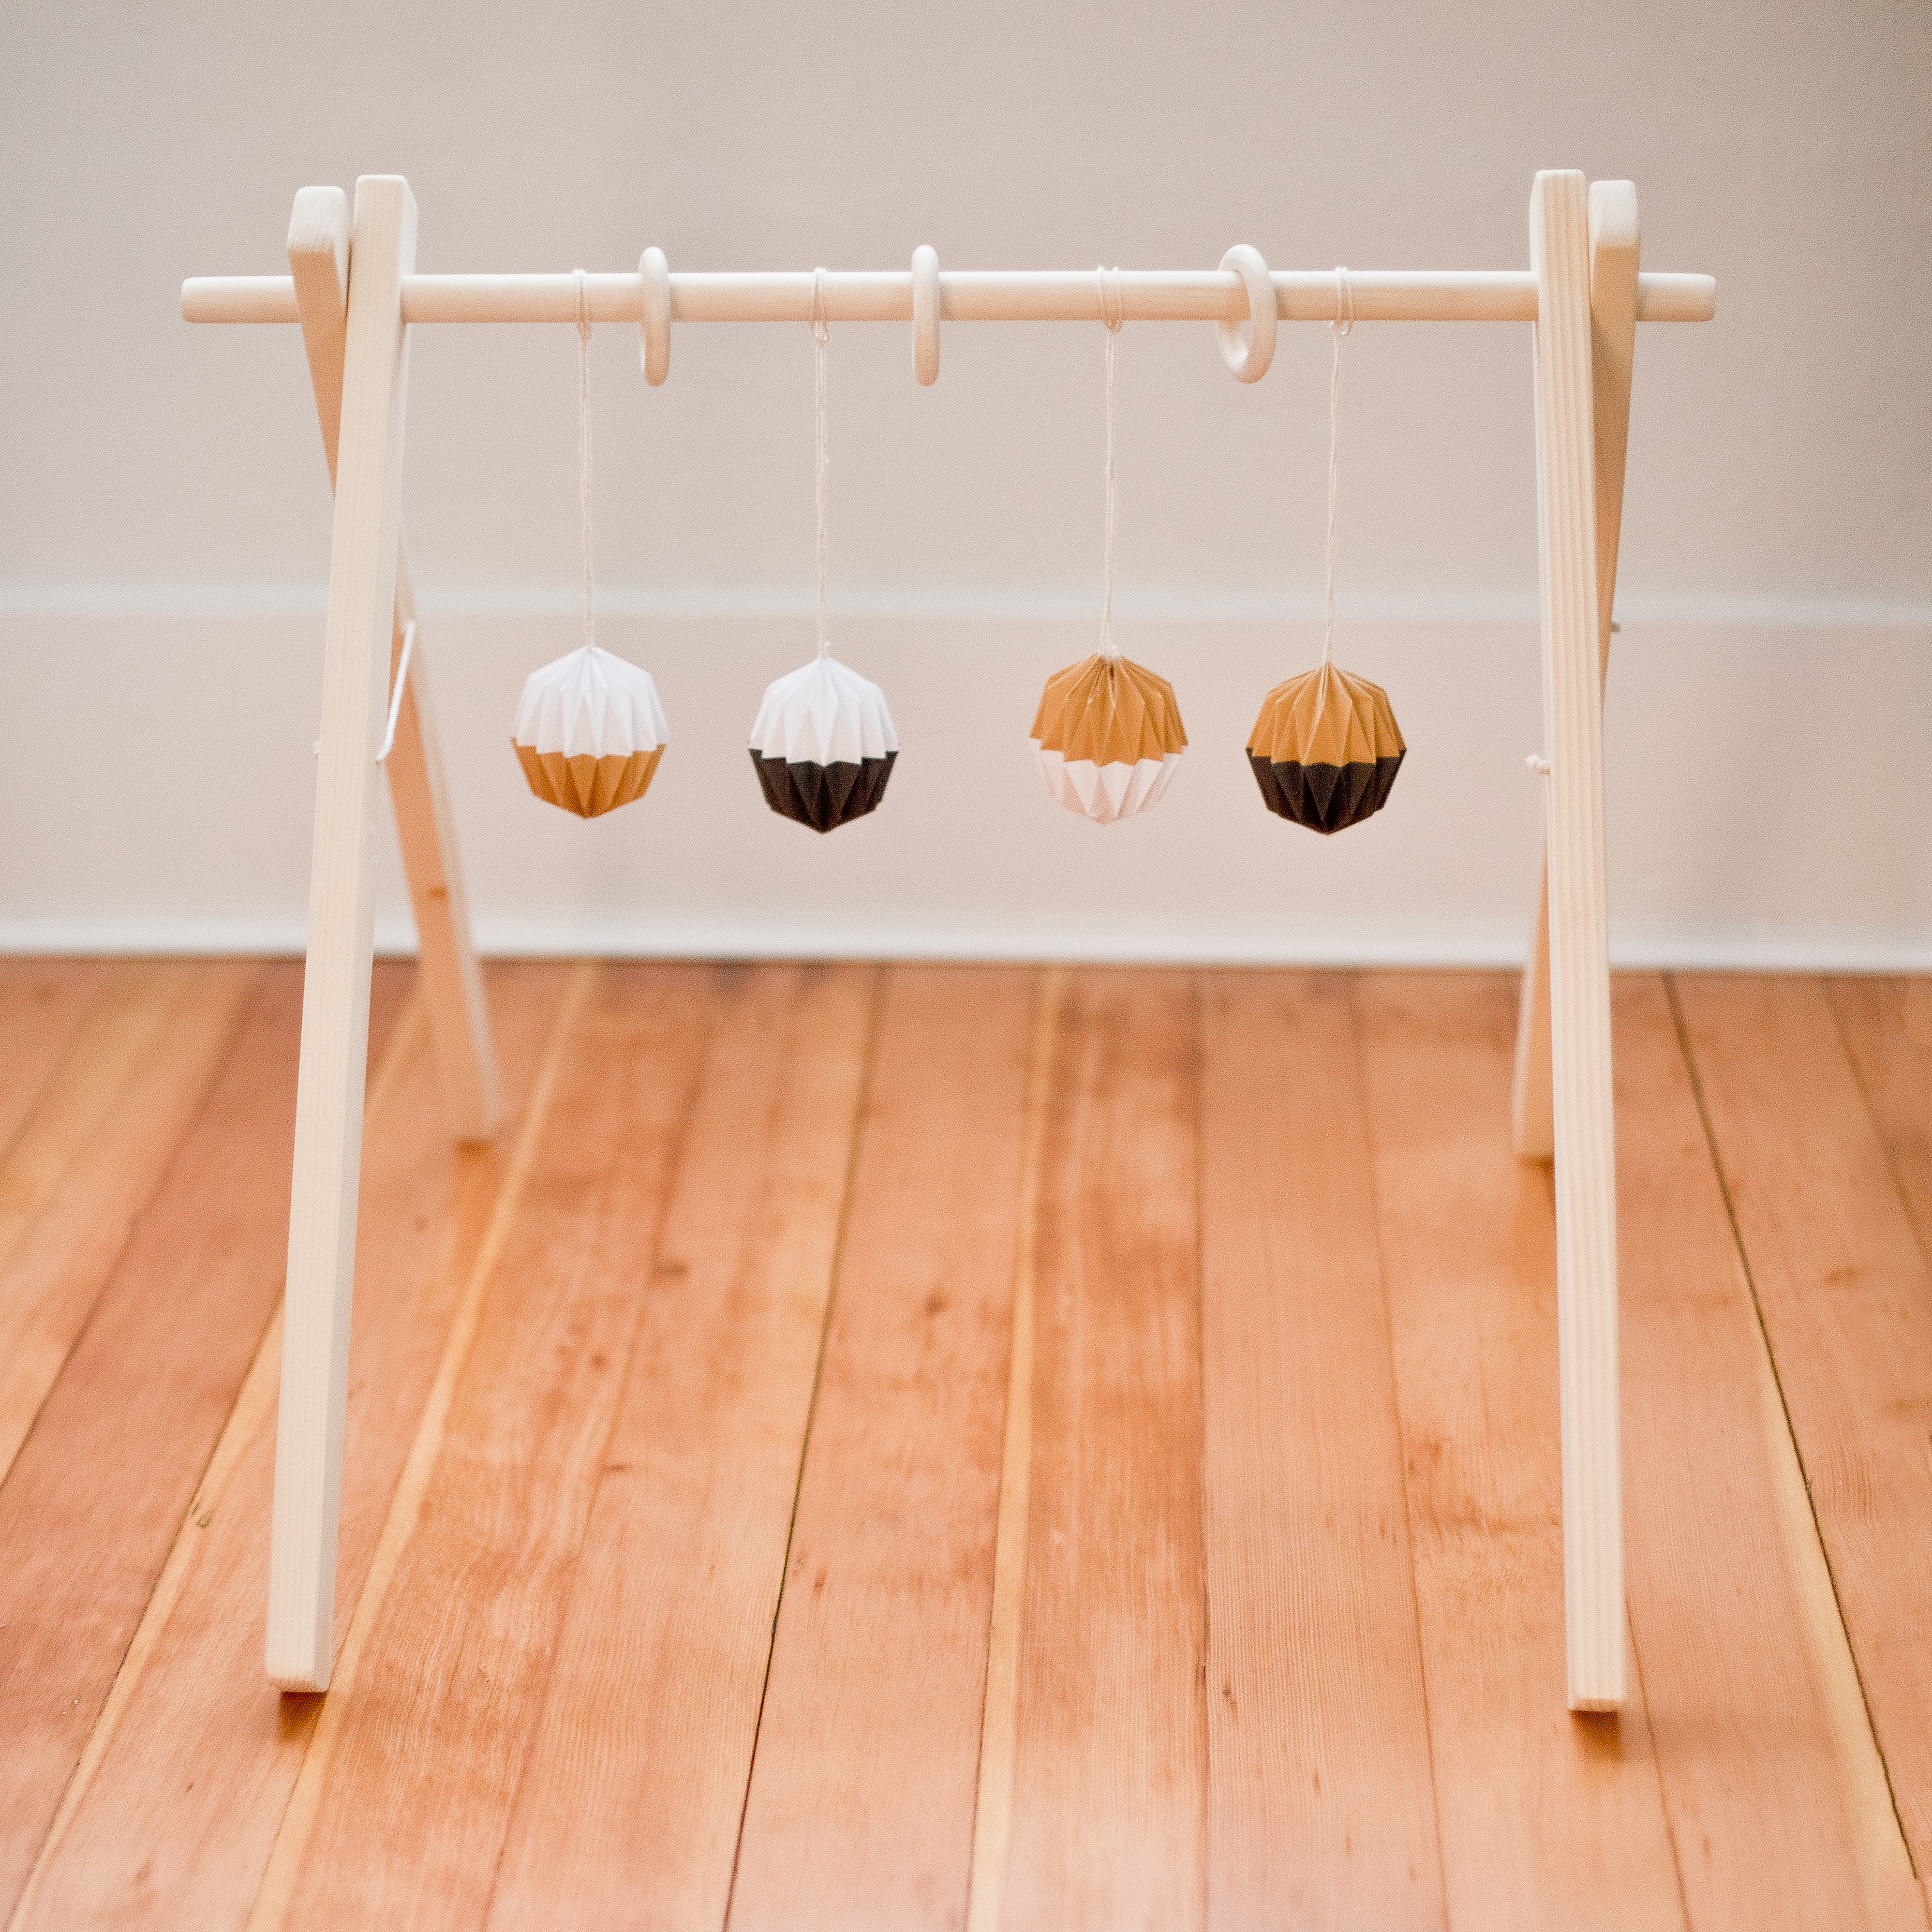
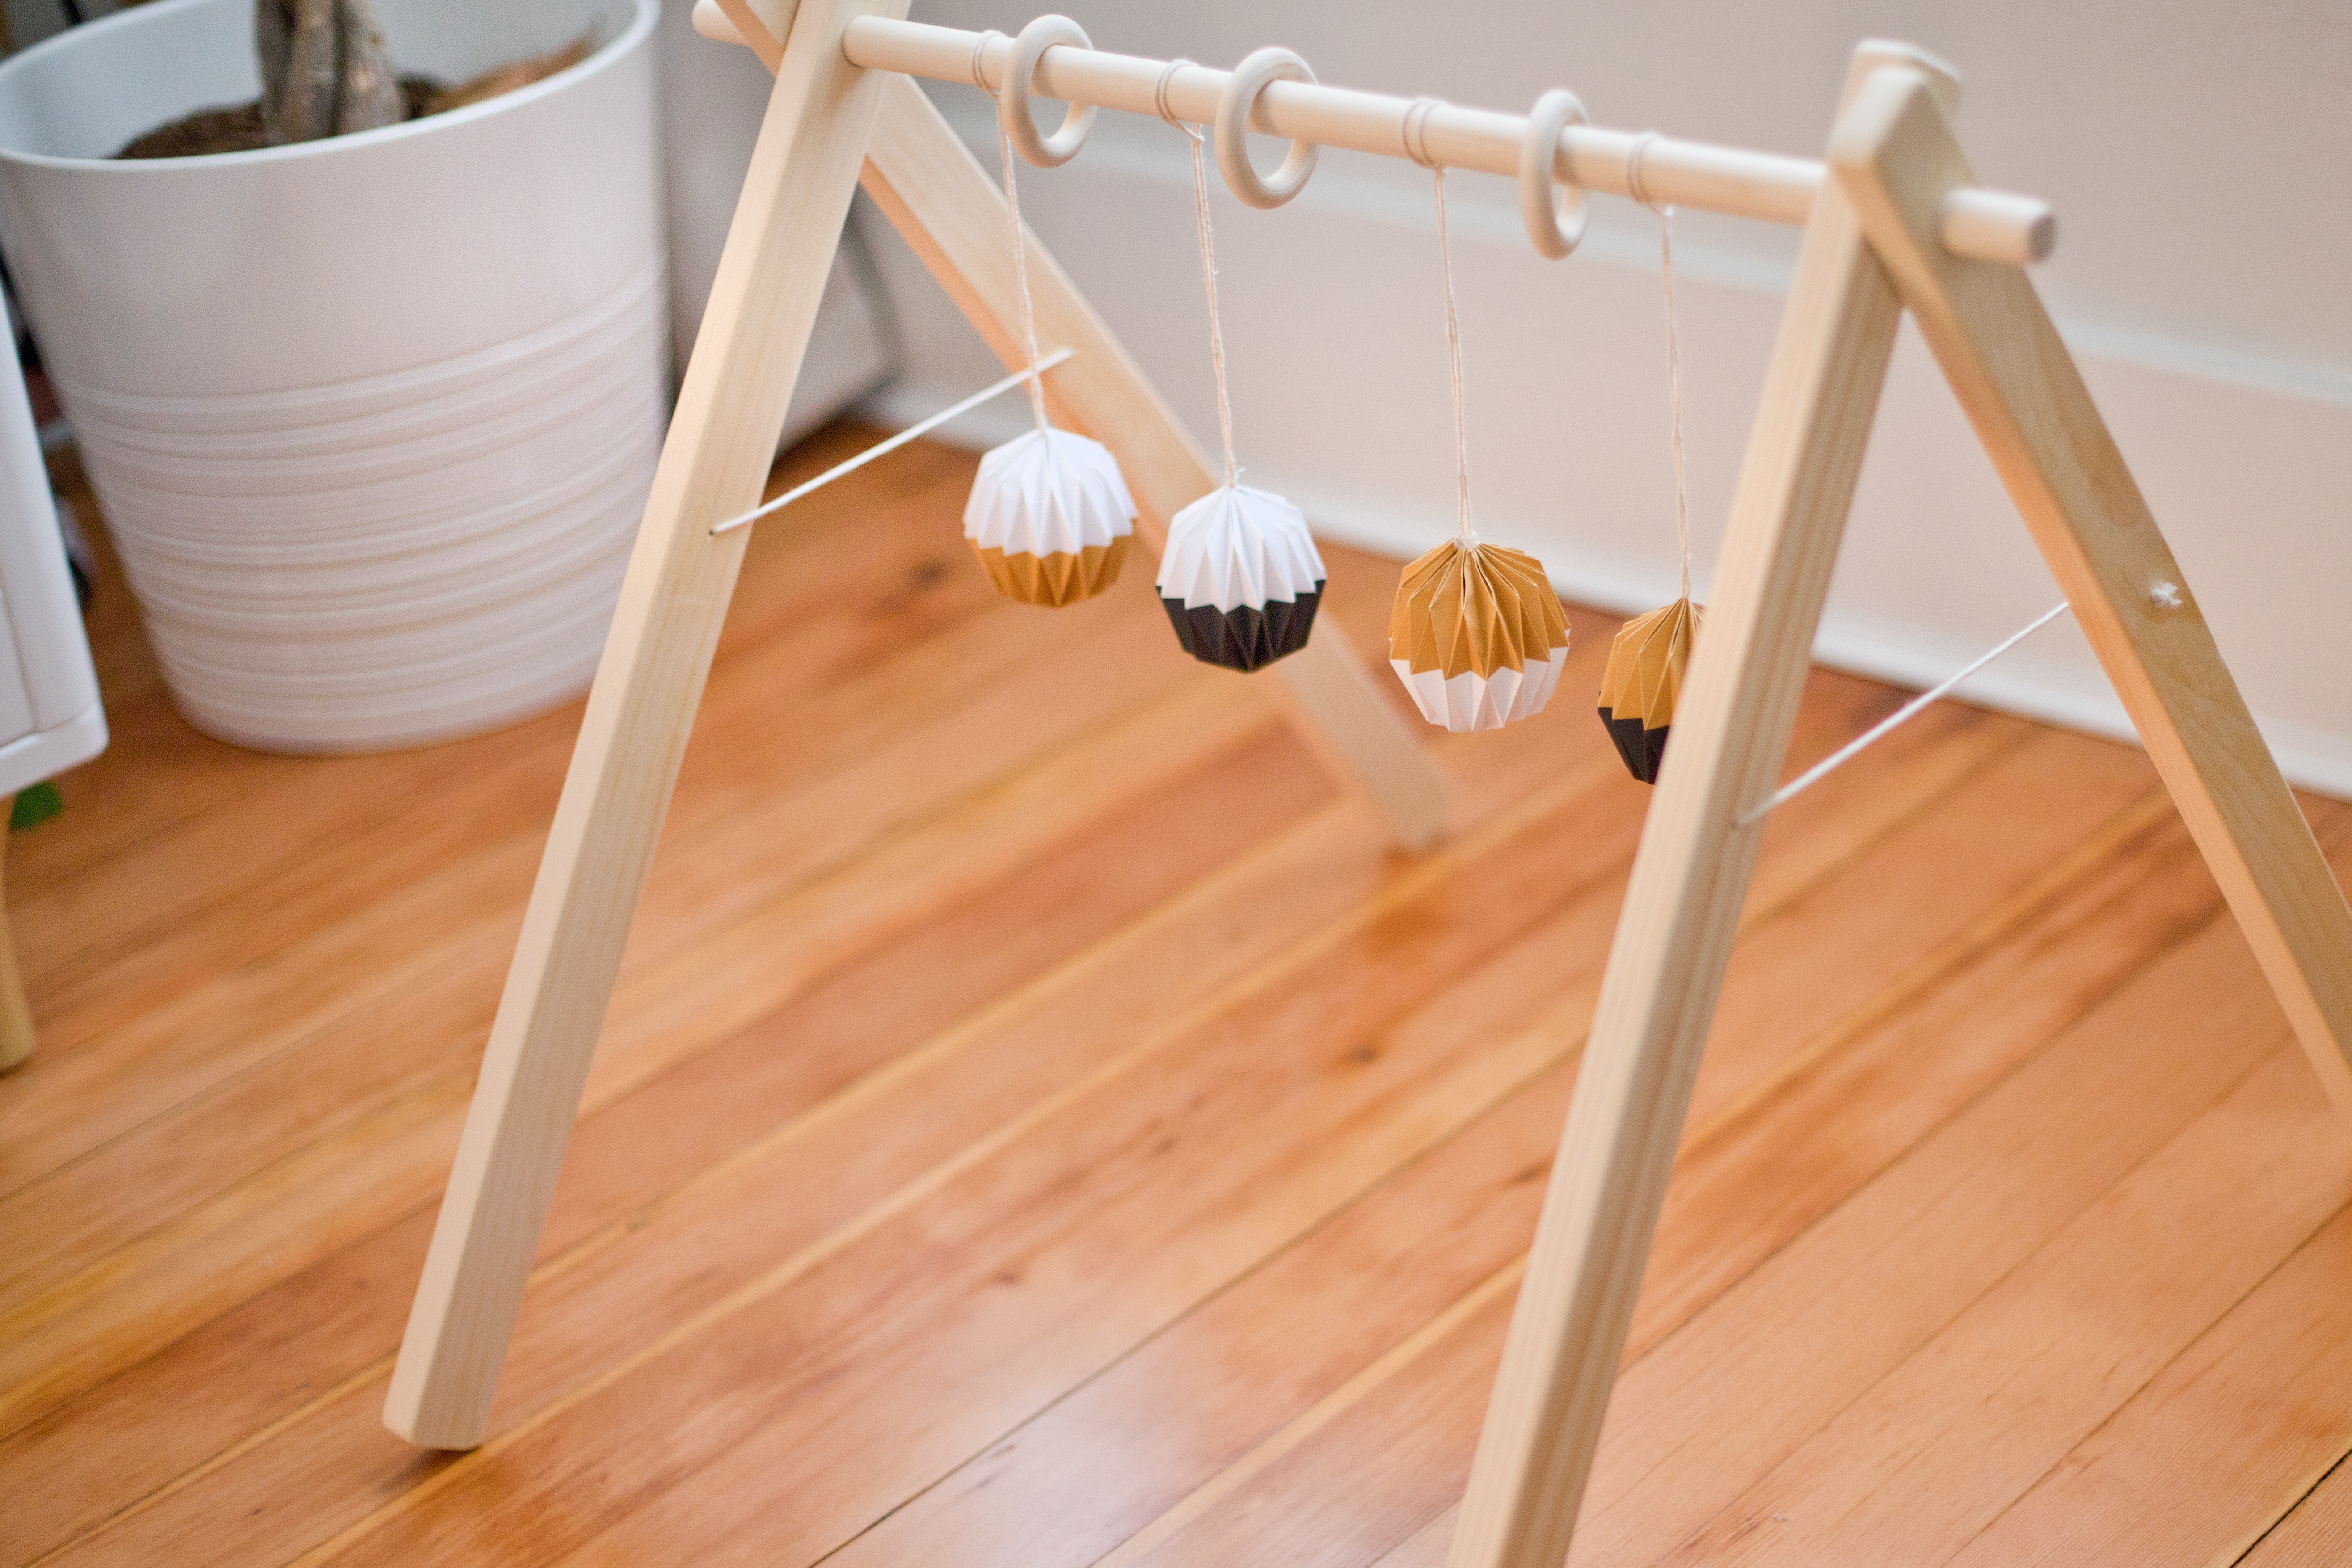
A while back, I bought a beautiful wood gym on Etsy that I thought would be perfect for Florence; however, it didn’t come with any toys and I’ve had trouble finding anything that I like enough. So, I enlisted Joey’s help to craft something, and he pulled through with a set of beautiful origami diamond spheres that are mid-century inspired. Although these are perfect for a play gym, they could be used for many things including ornaments (Christmas/Hanukah next year, anyone??) or party decorations. He was gracious enough to create a tutorial so you can make your own.
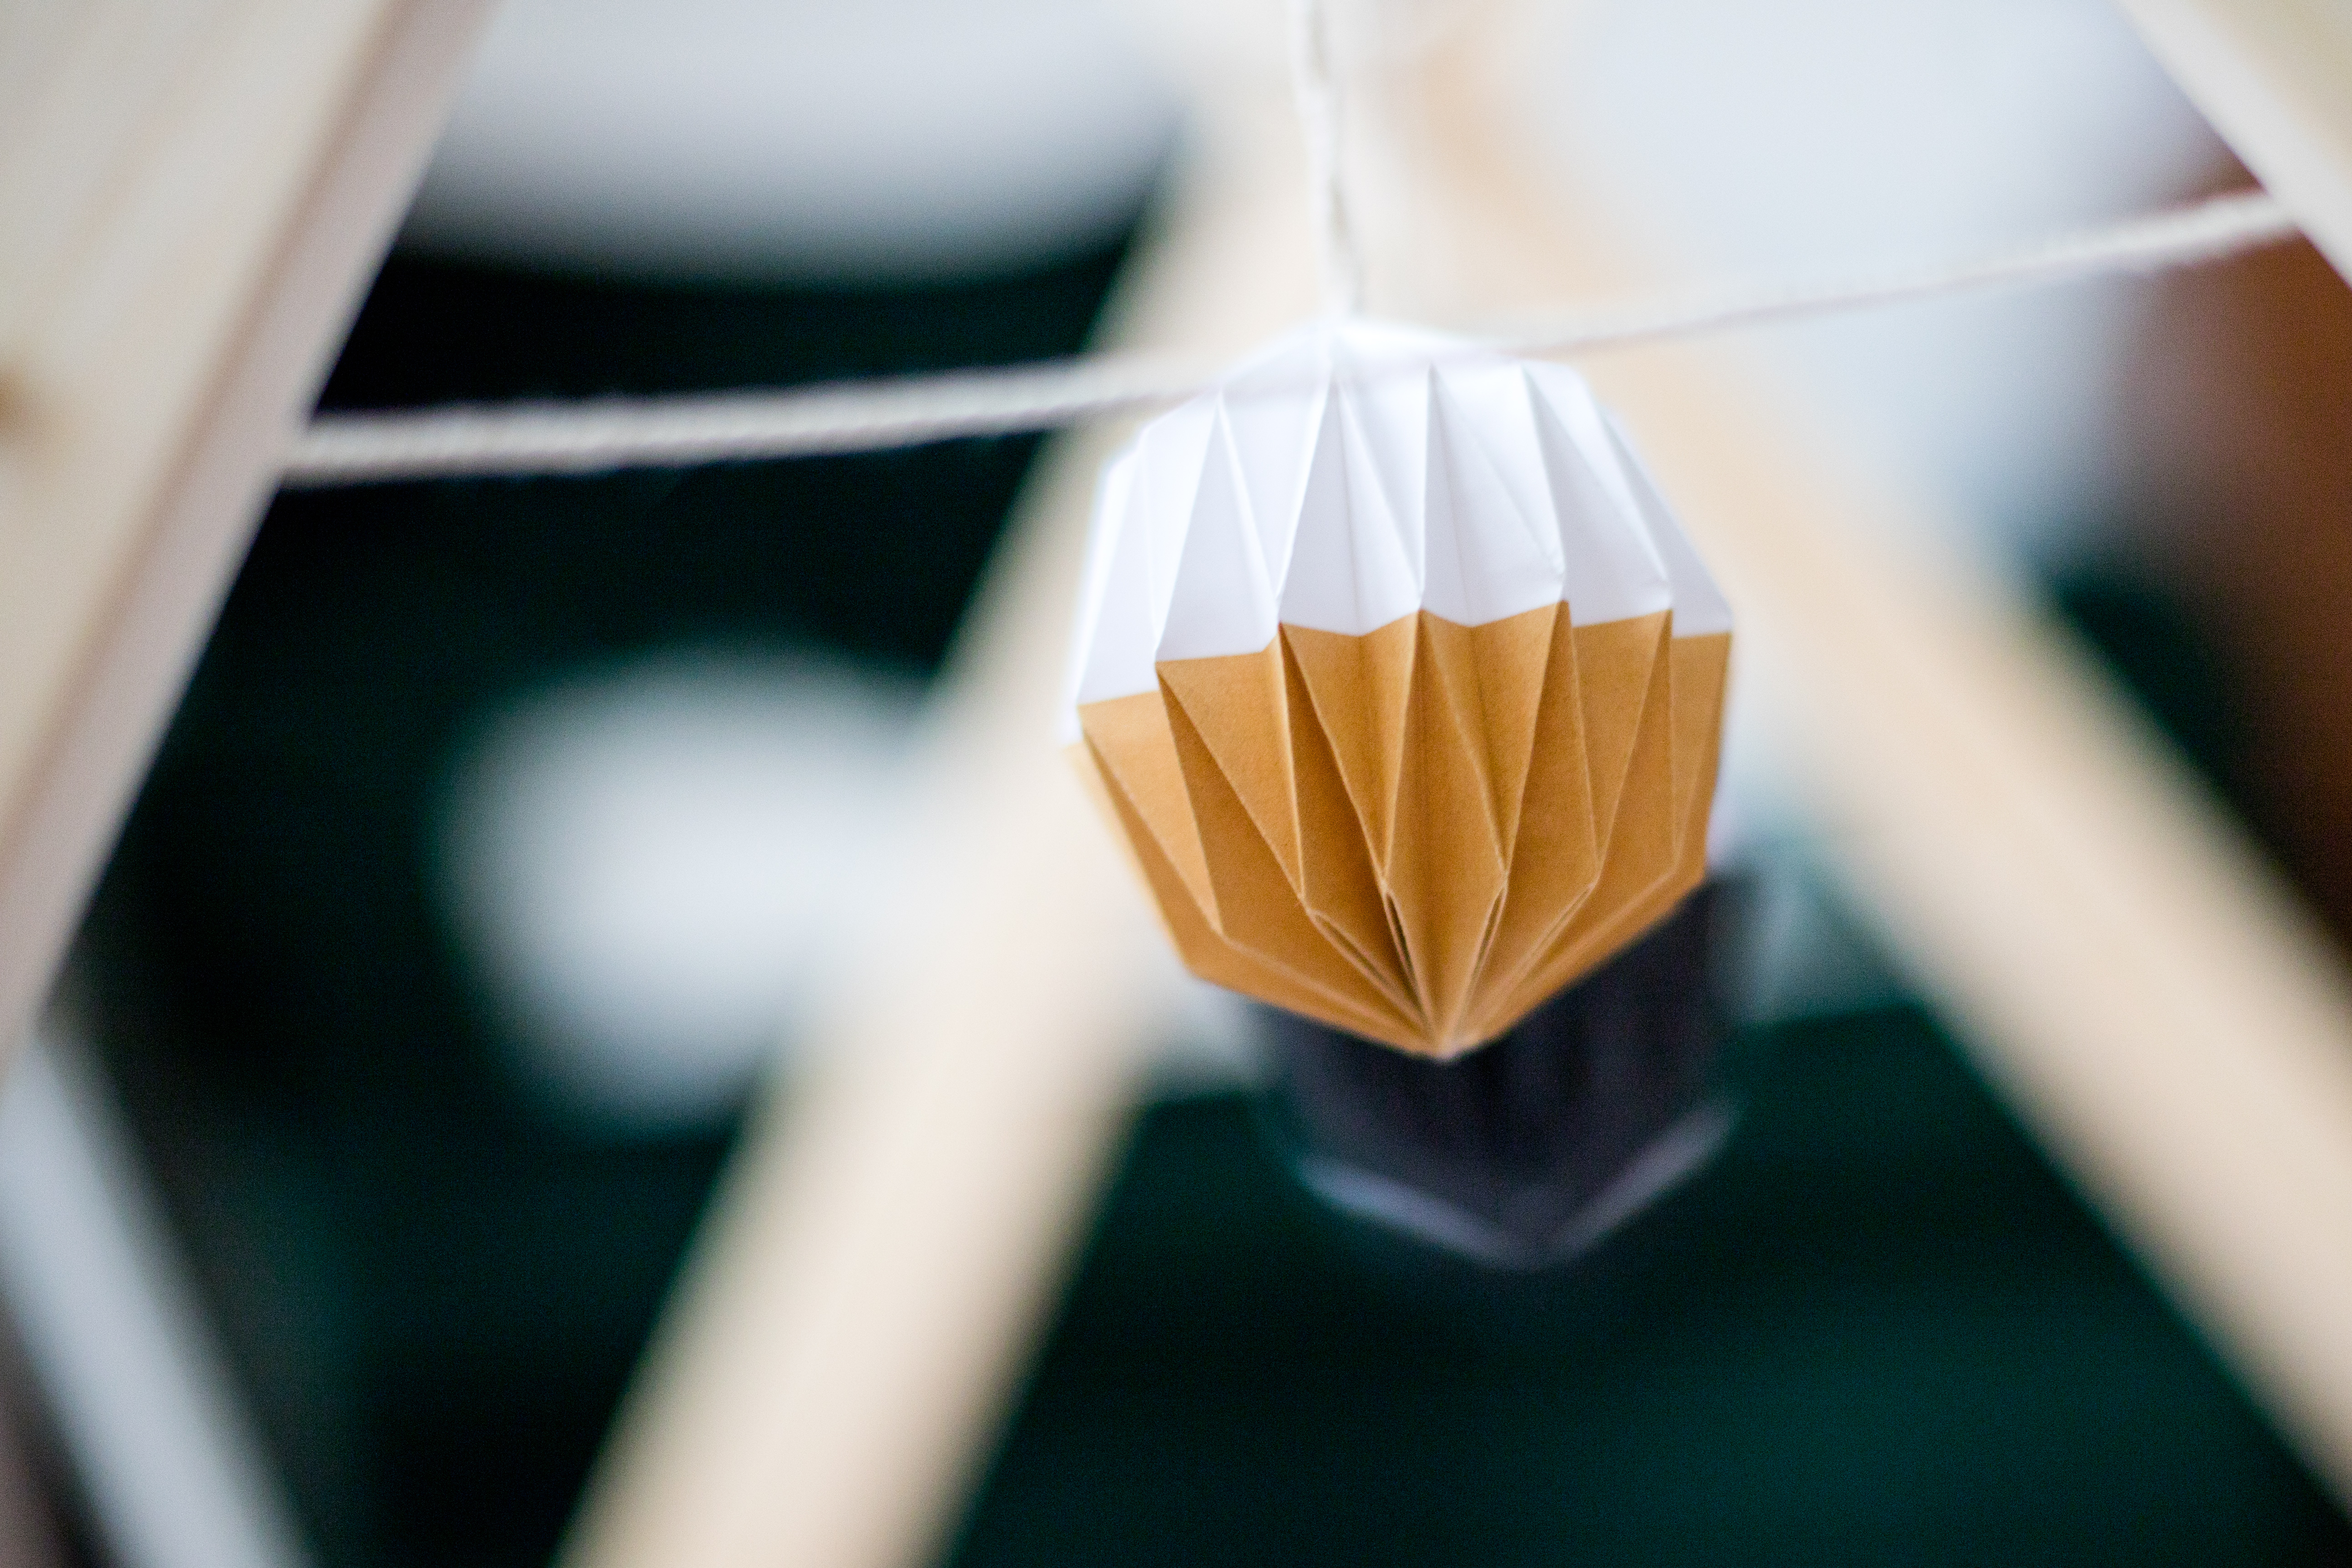
- To start, you need to download and print his template. Click here for the template with the folding lines. If you want your diamond balls to be white, you just need this; however, if you want to have colored ornaments, like in the photo, you’ll need to print double sided, and use one of these designs (here and here) for the backside of the template. Note: Joey used legal-sized paper (8.5″ x 14″) which creates two balls. You can print this out on regular 8.5 x 11 paper, though they will end up smaller in size when printed in the same aspect ratio, and thinner if you fit the artwork (the diamonds will be taller compared to the circumference).
- Trim the long outer edges of the paper where the lines end.
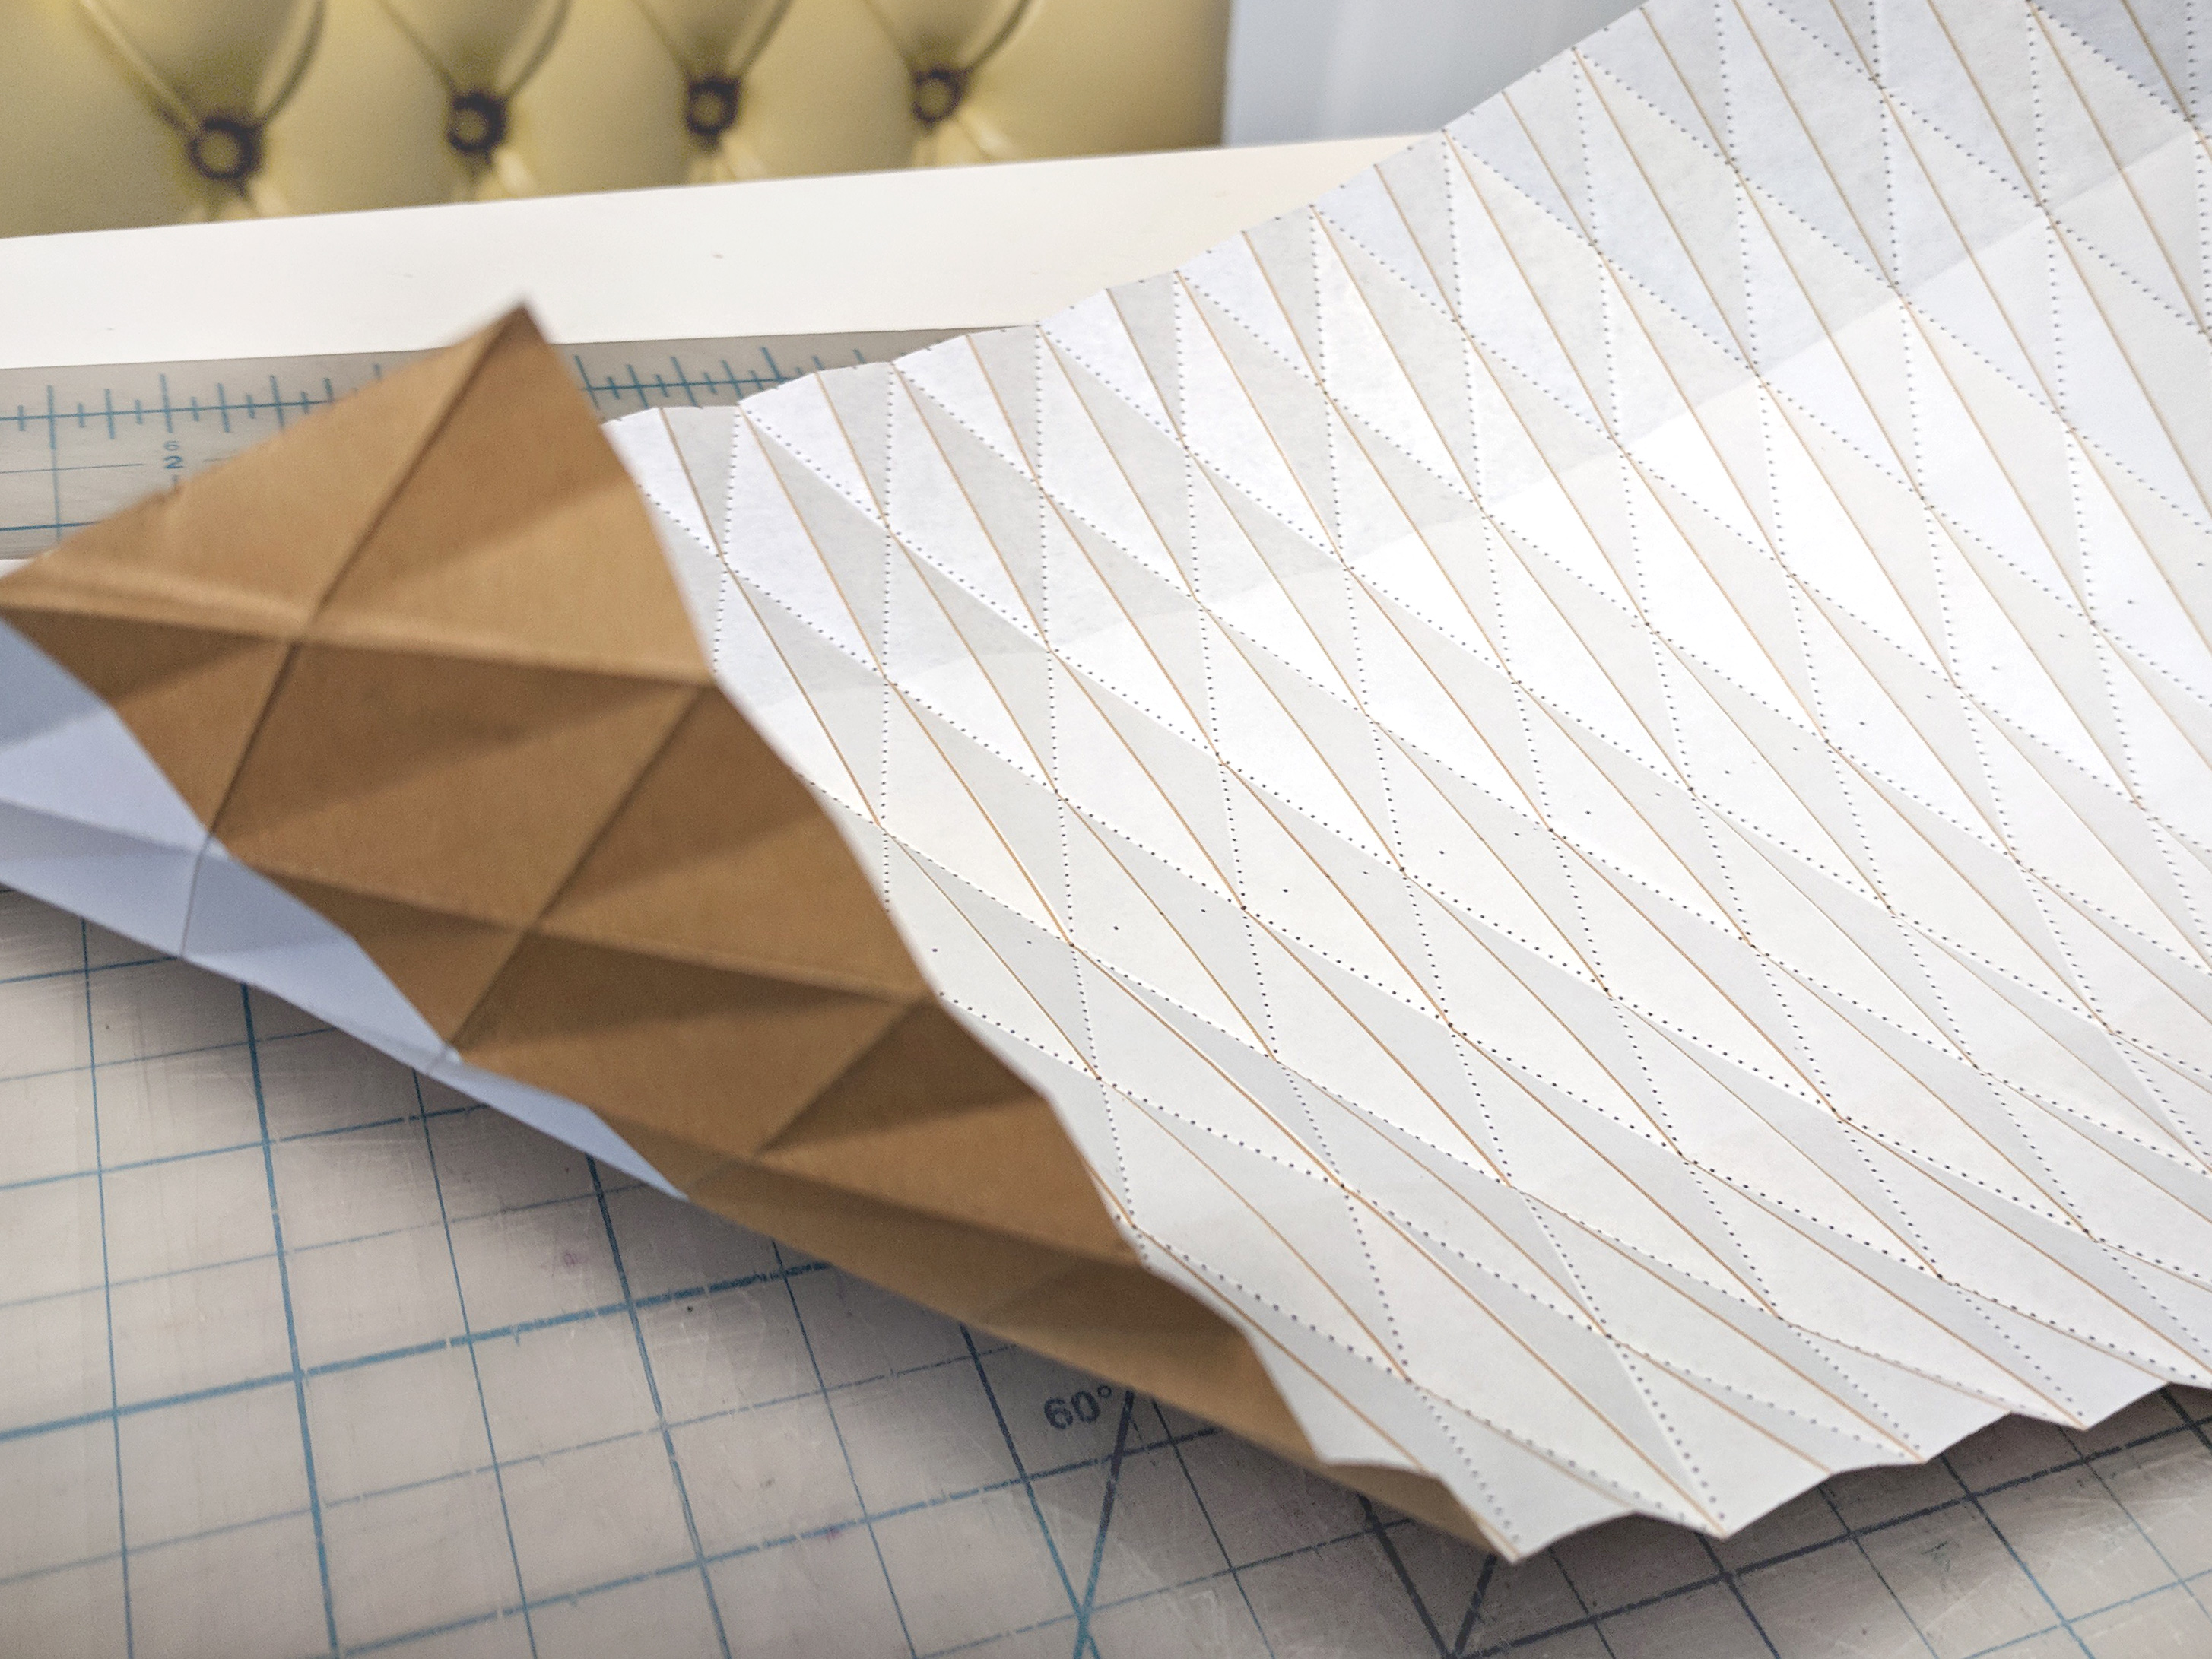
- Fold all the straight lines (printed in gold) so that the side with grid lines are visible when folded.
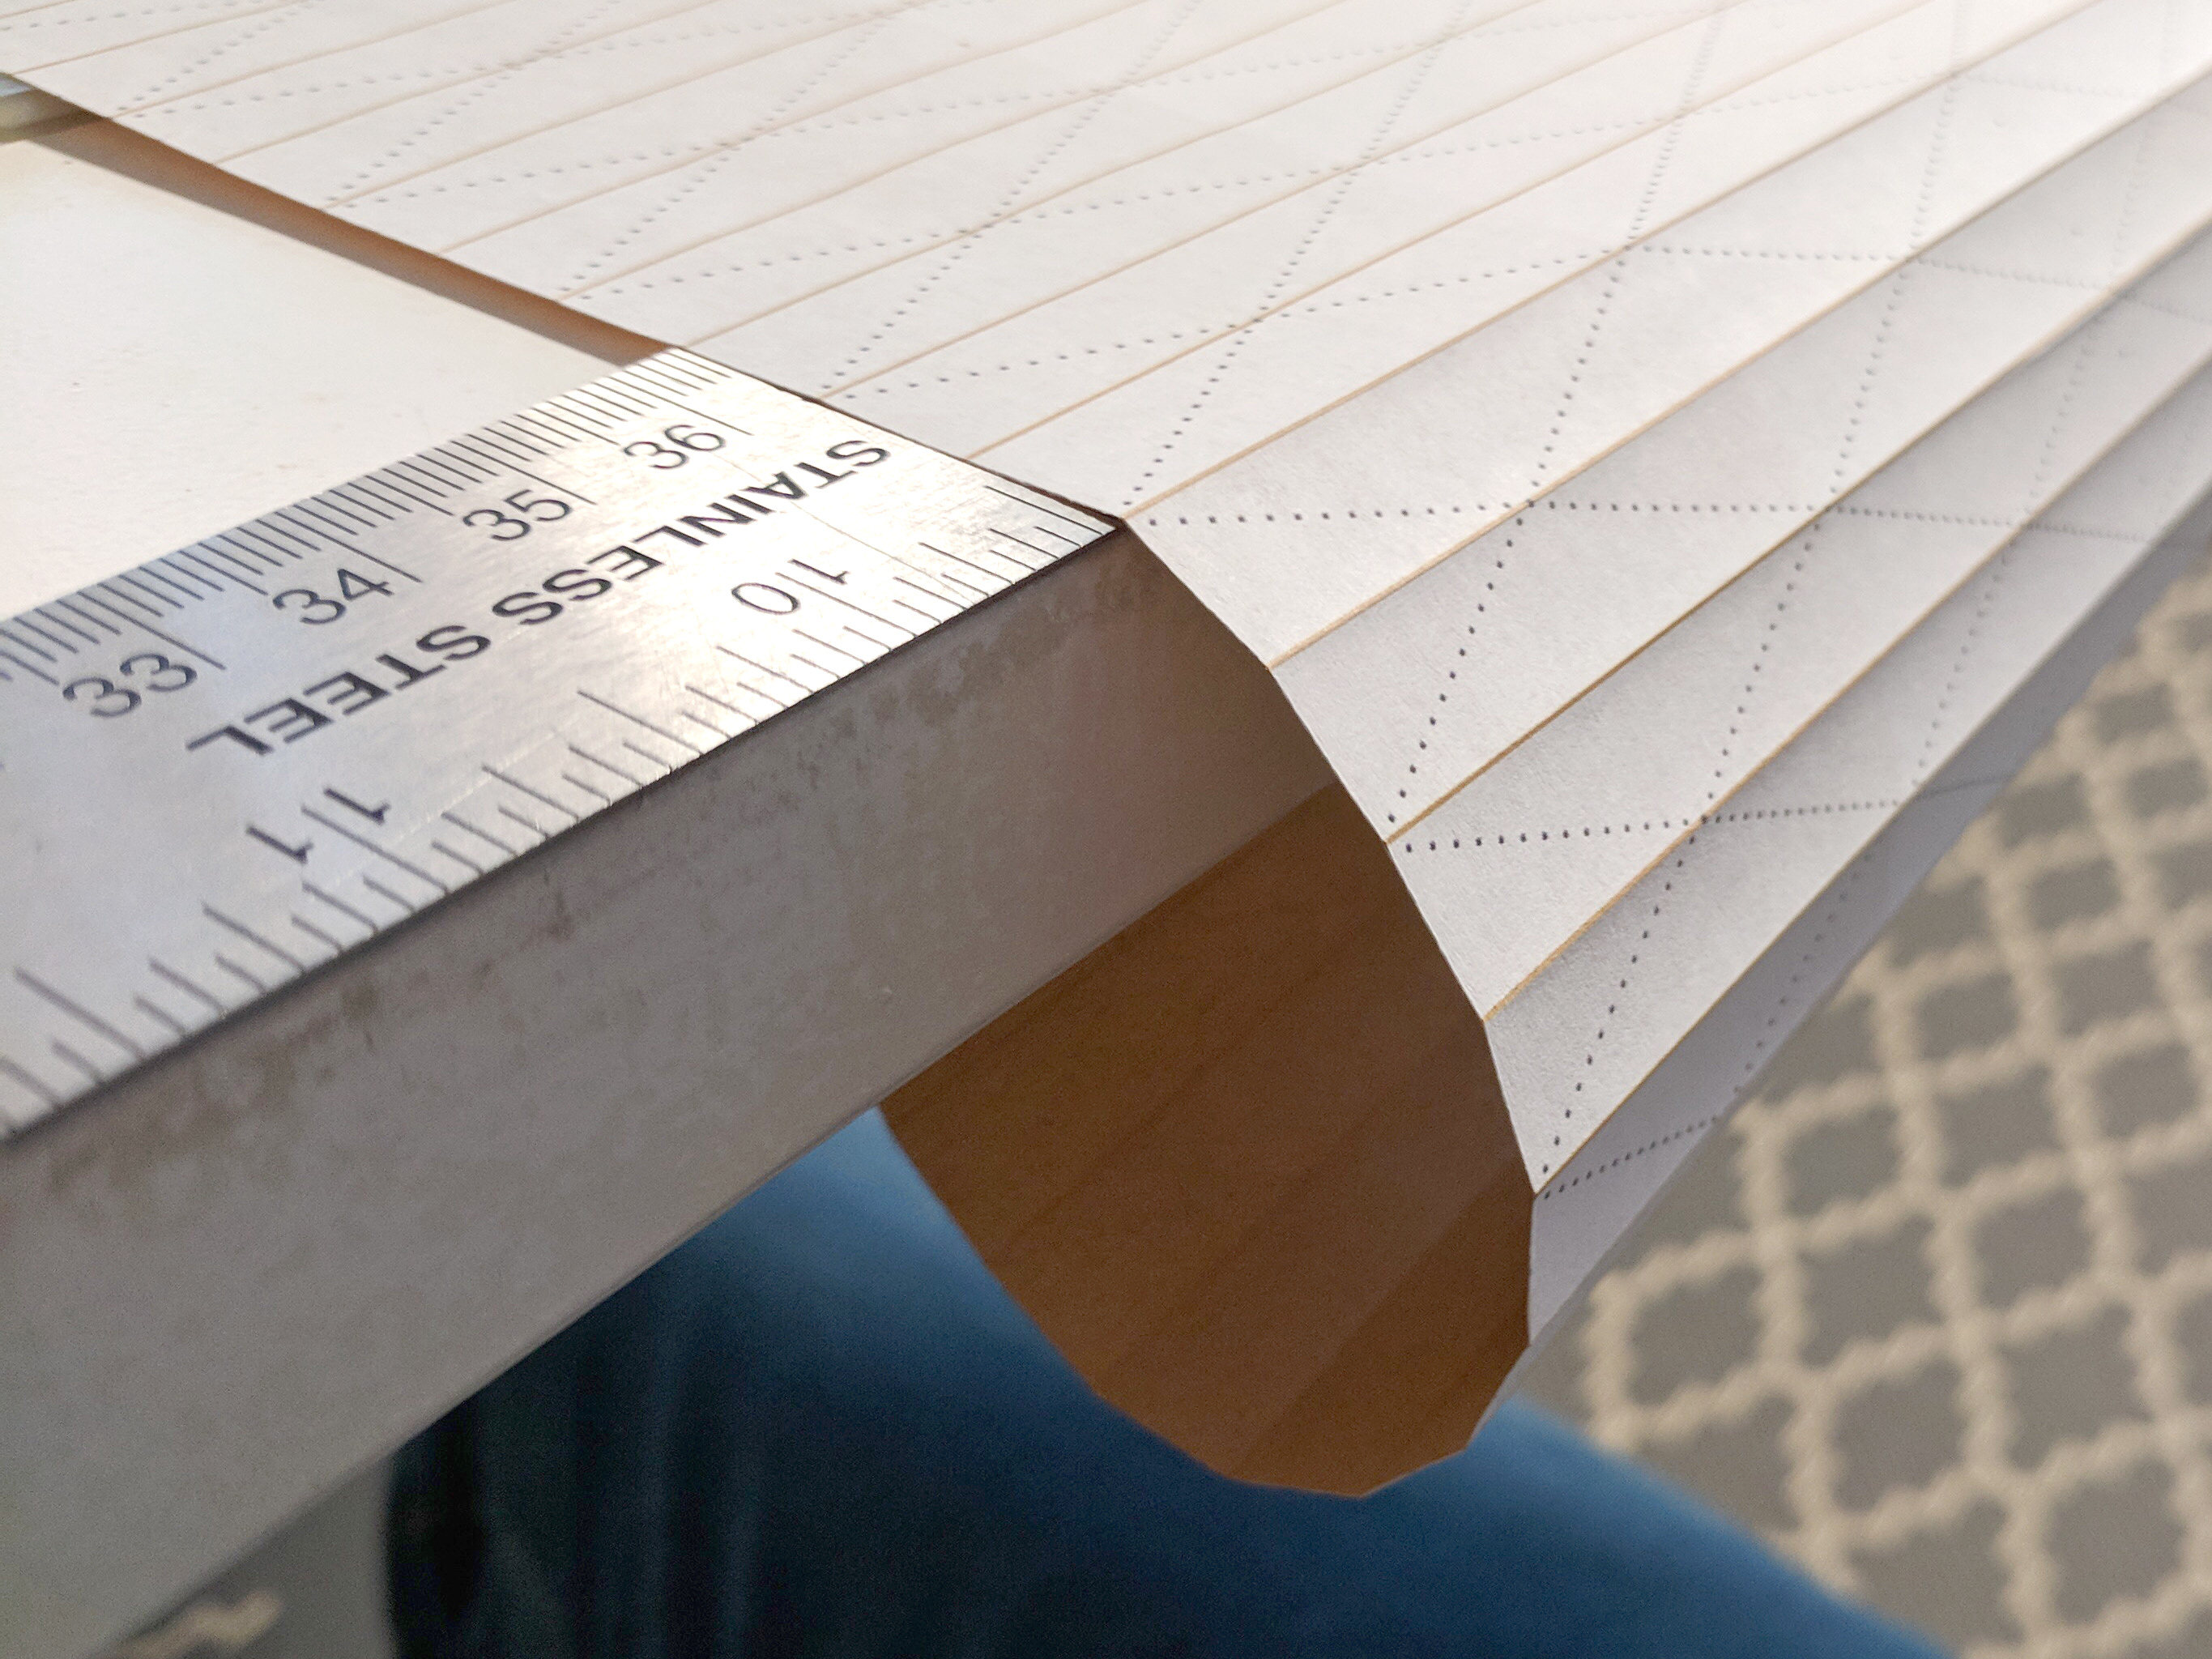
- Fold the slanted lines in the opposite direction of the paper (this time the grid lines are hidden underneath the fold)
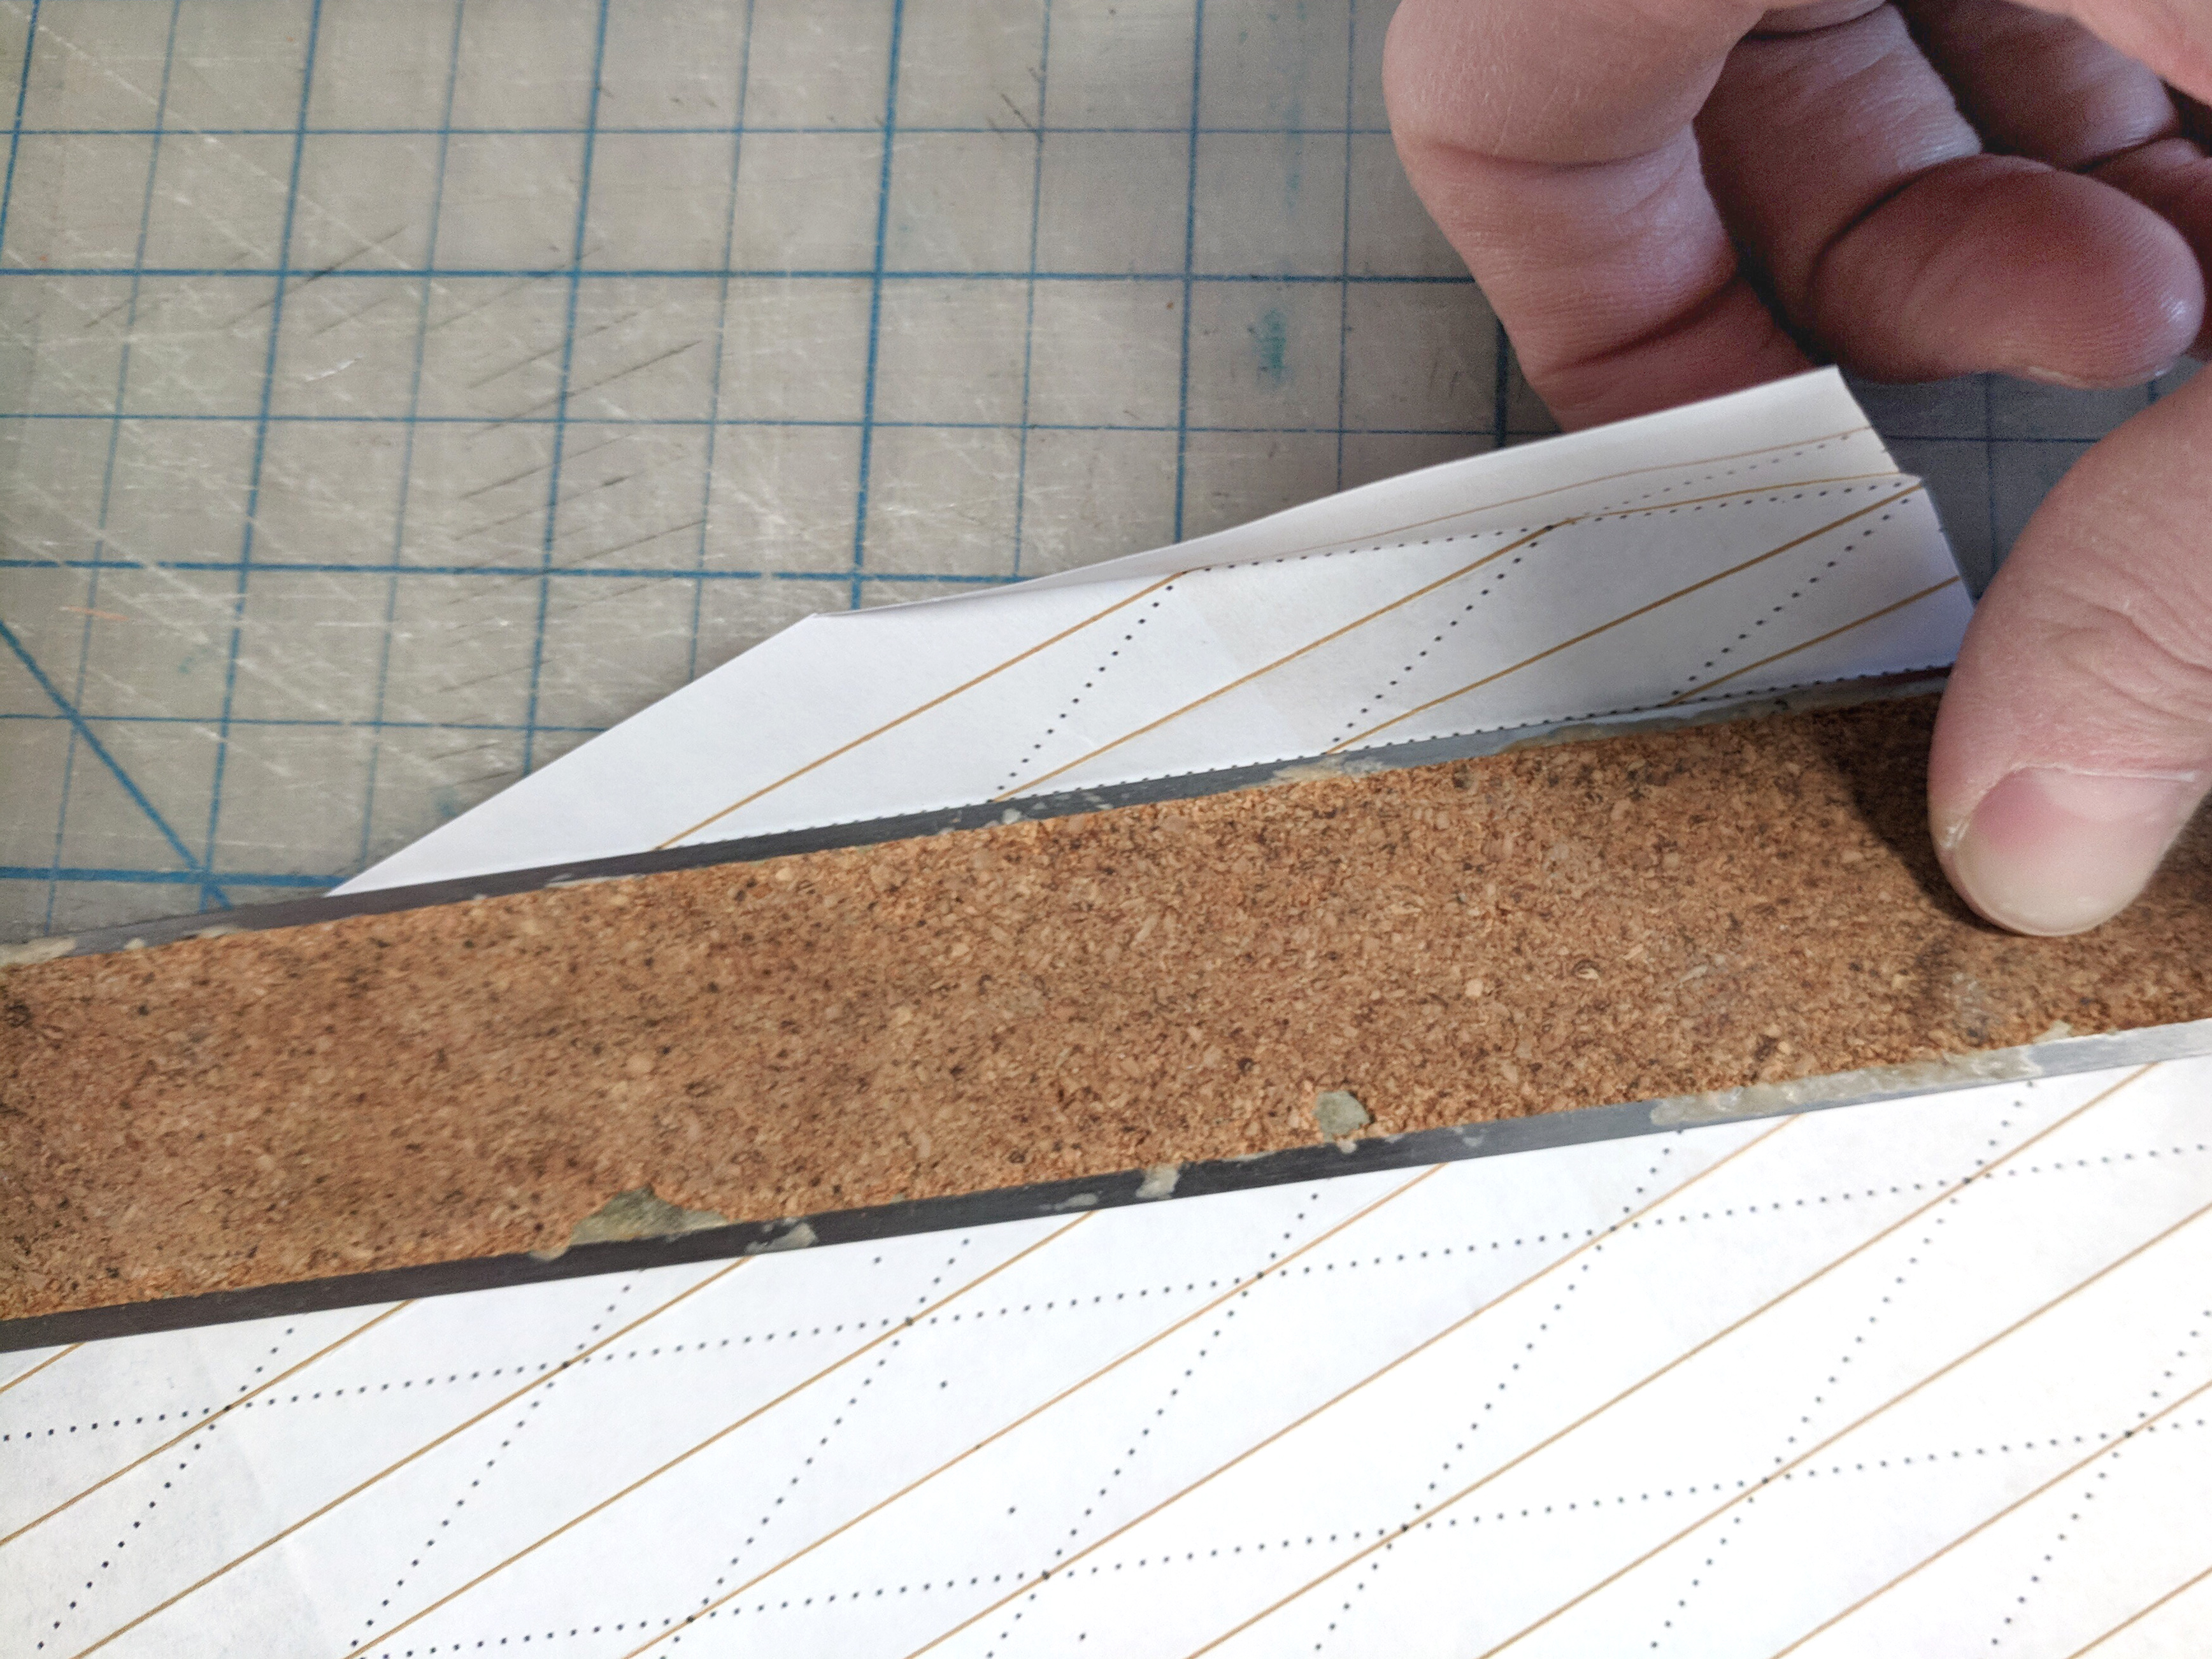
- Cut along the outermost gold lines (if you haven’t trimmed those already)
- Cut through the center of the gold lines to create two long strips.
- Re-crease all folds to create sharp edges with a “bone folder” or your fingernail.
- Gather up the paper by folding one side and continue to collect the triangular shapes so that each diamond shape alternates in angle. You should have a C-shaped pile that can be taped or glued on each edge to form a circle.
- Hot glue the top and bottom opening, and insert string or ribbon for hanging.
They key is to make the folds as crisp as possible. Otherwise, it’s fairly simple, although definitely time consuming. It was worth it though, because Florence loves her new hanging toys. They provide just the right amount of visual stimulation.

I love them too, because they are stylish and don’t clash with the decor in her nursery.
Thanks, Joey!