It’s becoming a tradition that every year for Christmas, I go all out for Florence’s gift and do an Ikea Hack. Last year it was the kitchen, which she plays with every day still. This year, I decided to hack the Flisat Dollhouse, and I went allllllll out. If you follow me on Instagram (@ffolkewife), you can see the in progress pictures. It was quite a process.
But before I get into details, here is the before.

And here is the after.

Let’s go room by room, starting with my favorite room, the Bathroom!
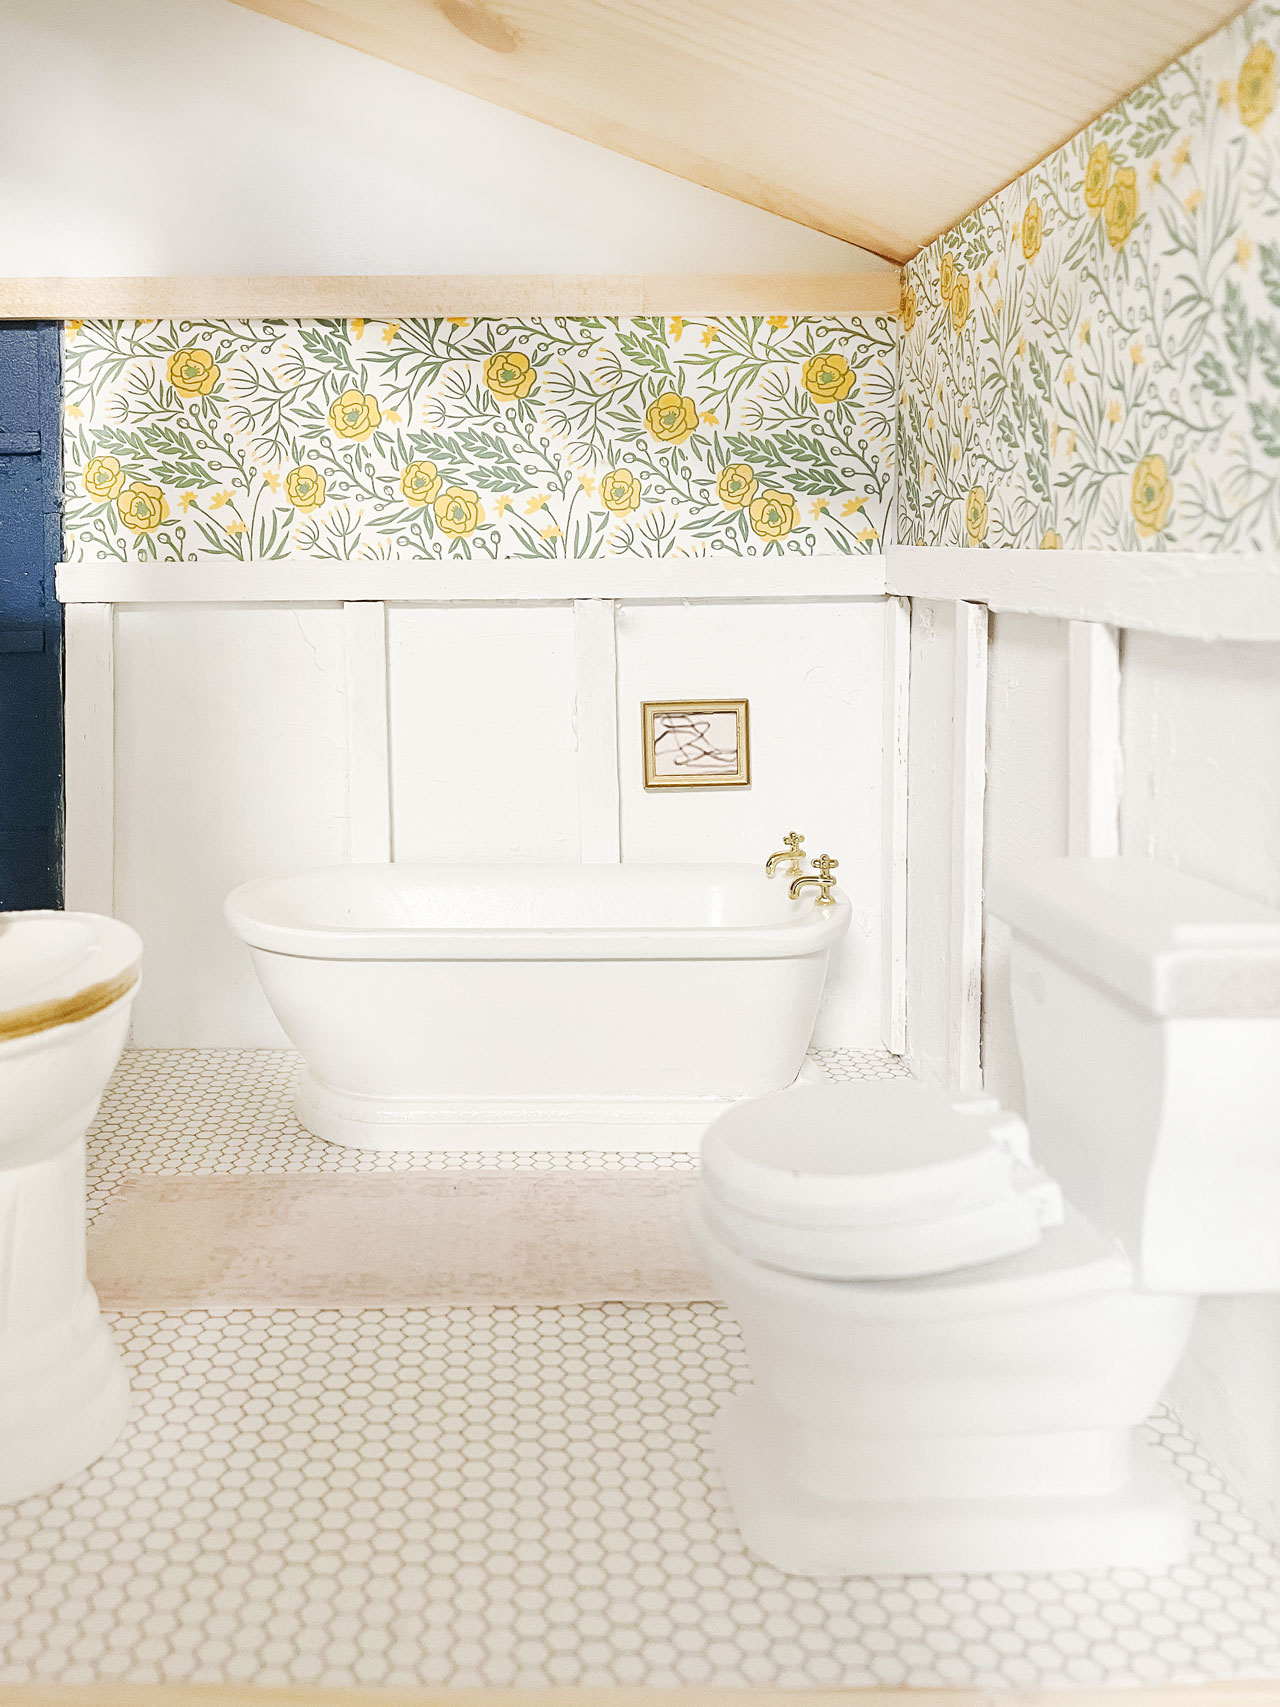
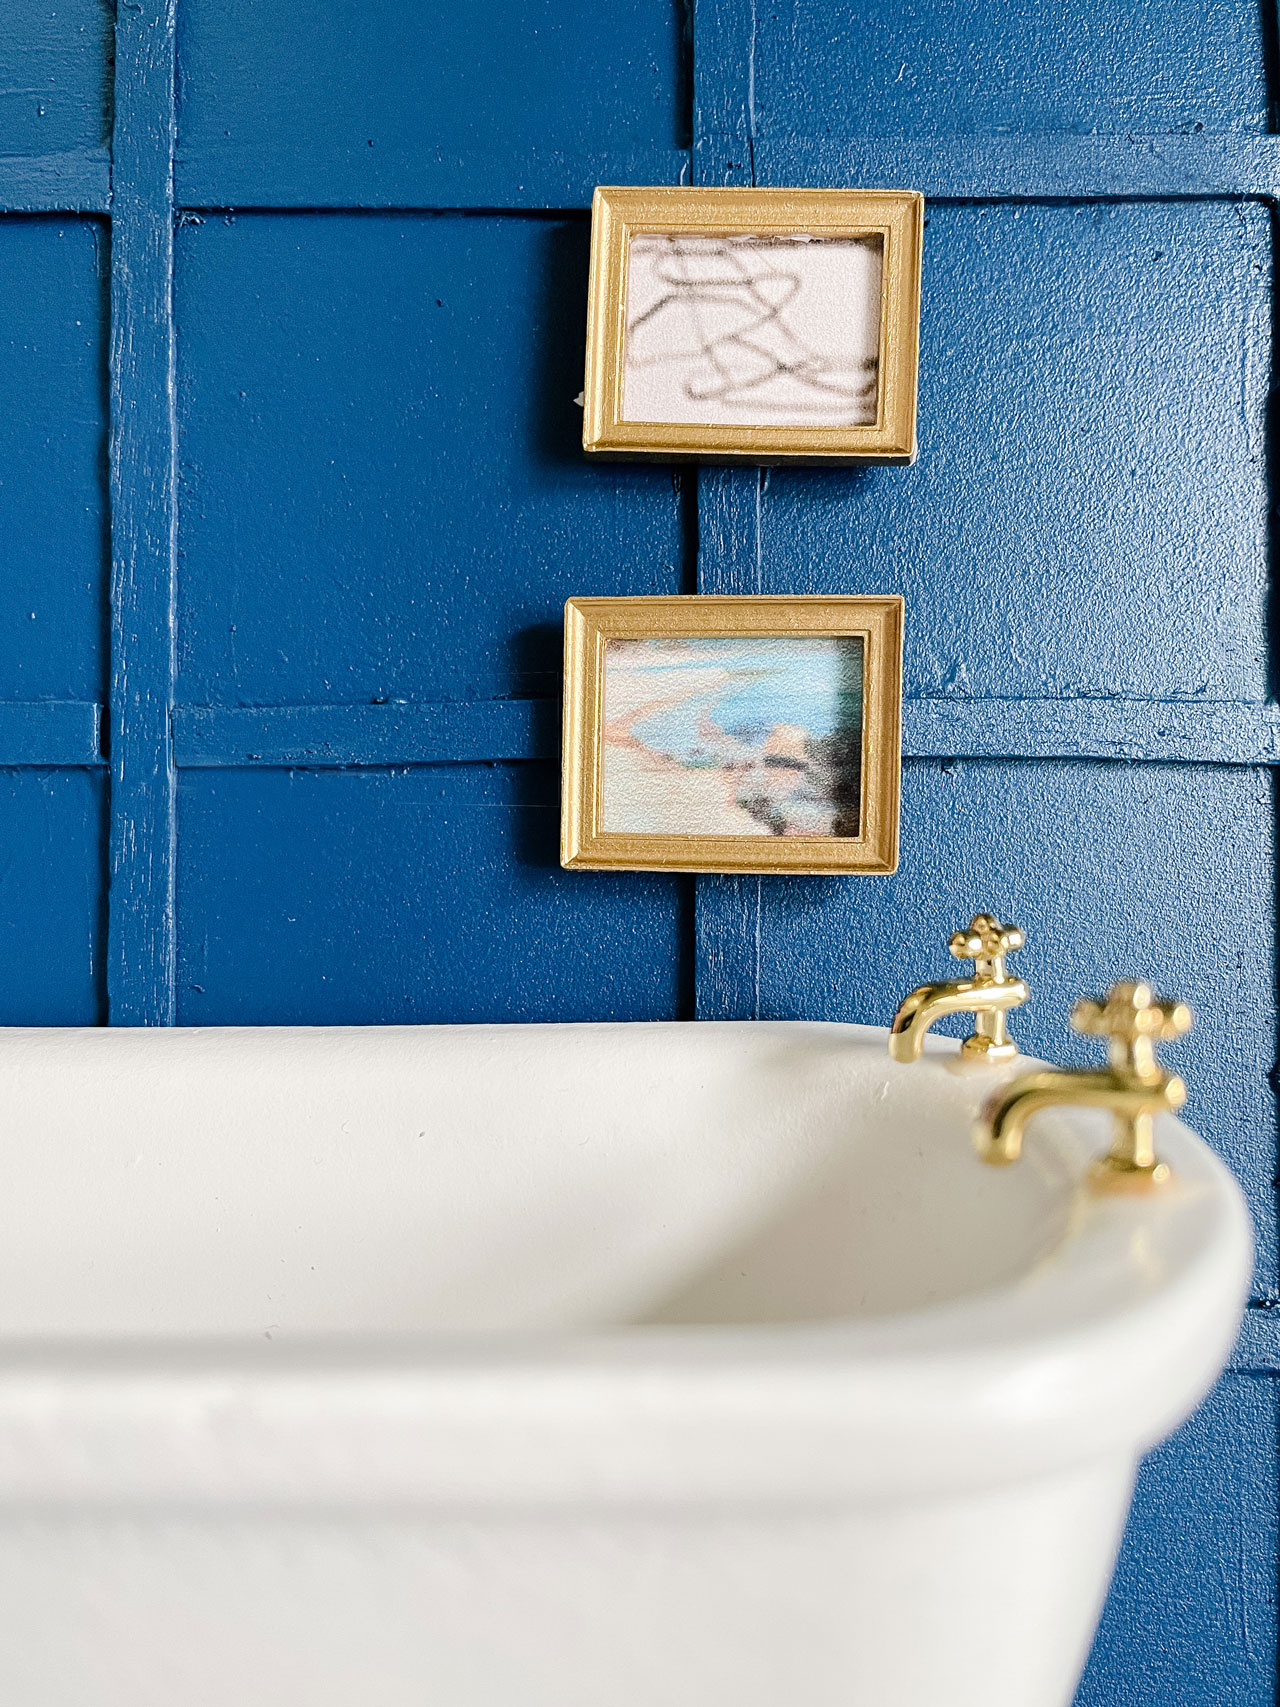
So the bathroom was a pain because I originally wanted to do beadboard and a peg rail (like our basement), so I spent a very long time hot gluing coffee stirrers to the wall. I got a lot of burns on my hands and once I was done, I hated it. It just looked super messy. So I decided to rip it out and start fresh with a more simple design. I went with balsa wood for the paneling and I added a fun wallpaper above. For the flooring, I created a hex pattern in Photoshop and printed it on card stock. Unfortunately I deleted the file before saving, or else I would have added it as a free printable to this post.
Here are the sources:
- Bathtub, Toilet, and Sink: Melissa and Doug set which I spray painted white.
- Wallpaper: Treehouse Threads free printable
- Picture Frame
- Picture: Juniper Print Shop
- Floor: Photoshop
- Rug: Vintage design printed on velour paper
- Paneling: Balsa wood assorted back
- Beam: Balsa Wood
Moving on to the Bedroom, this room was also a bit of a beast. I really leaned into the paneling.
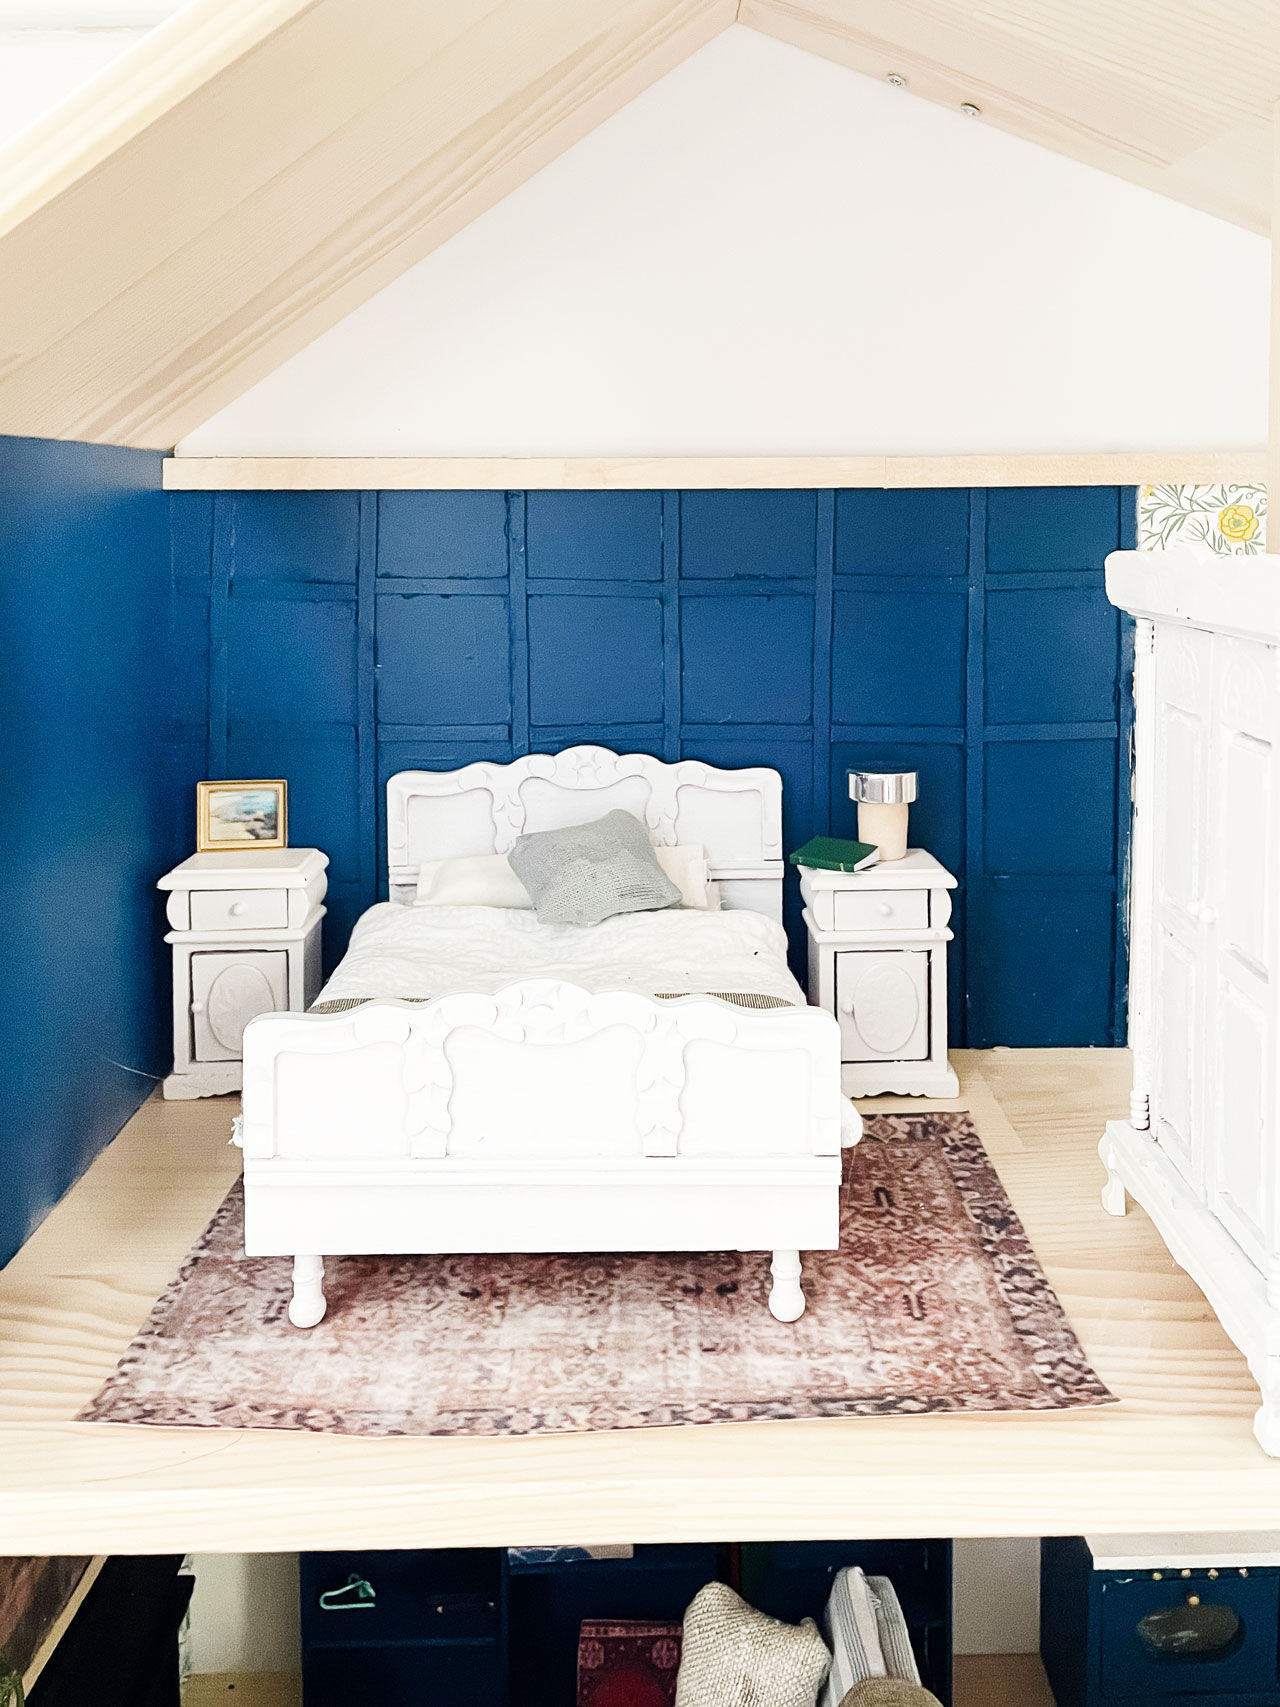
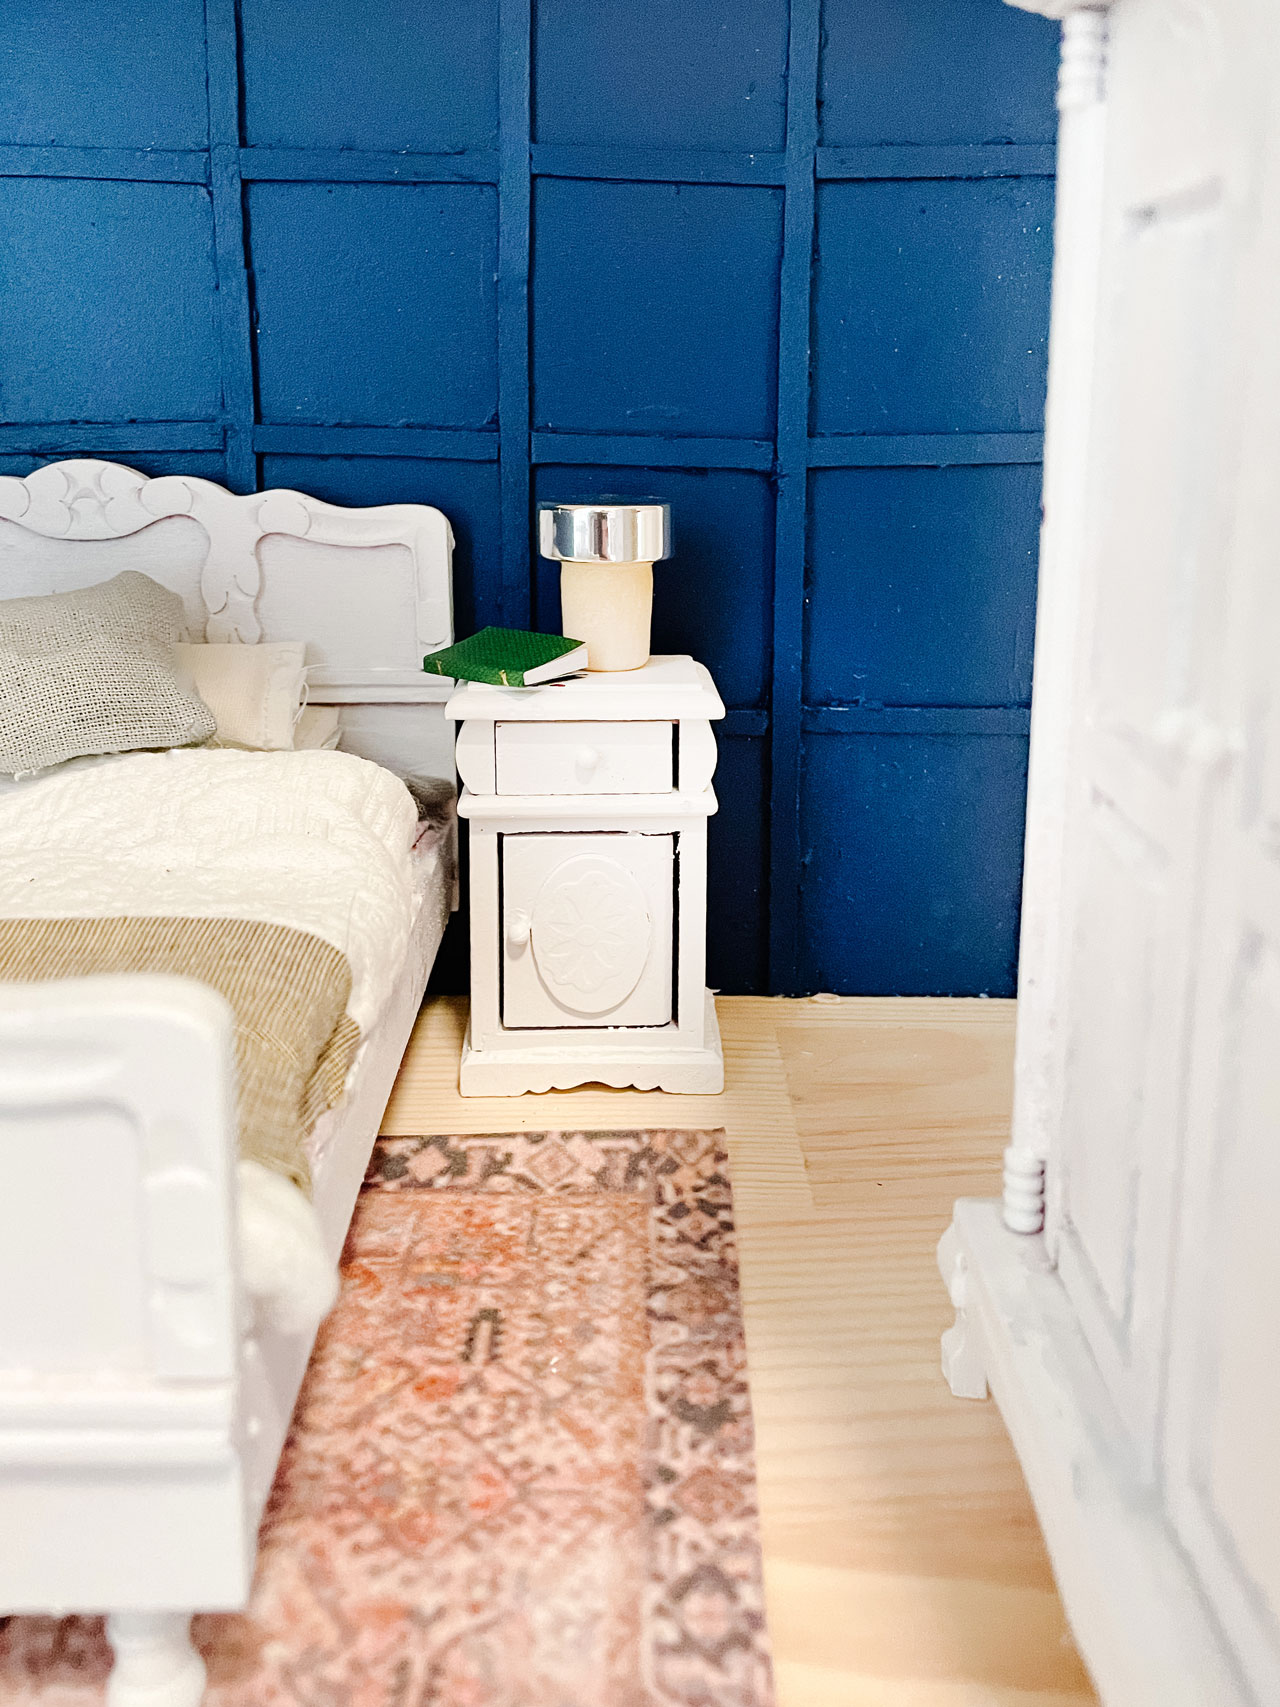
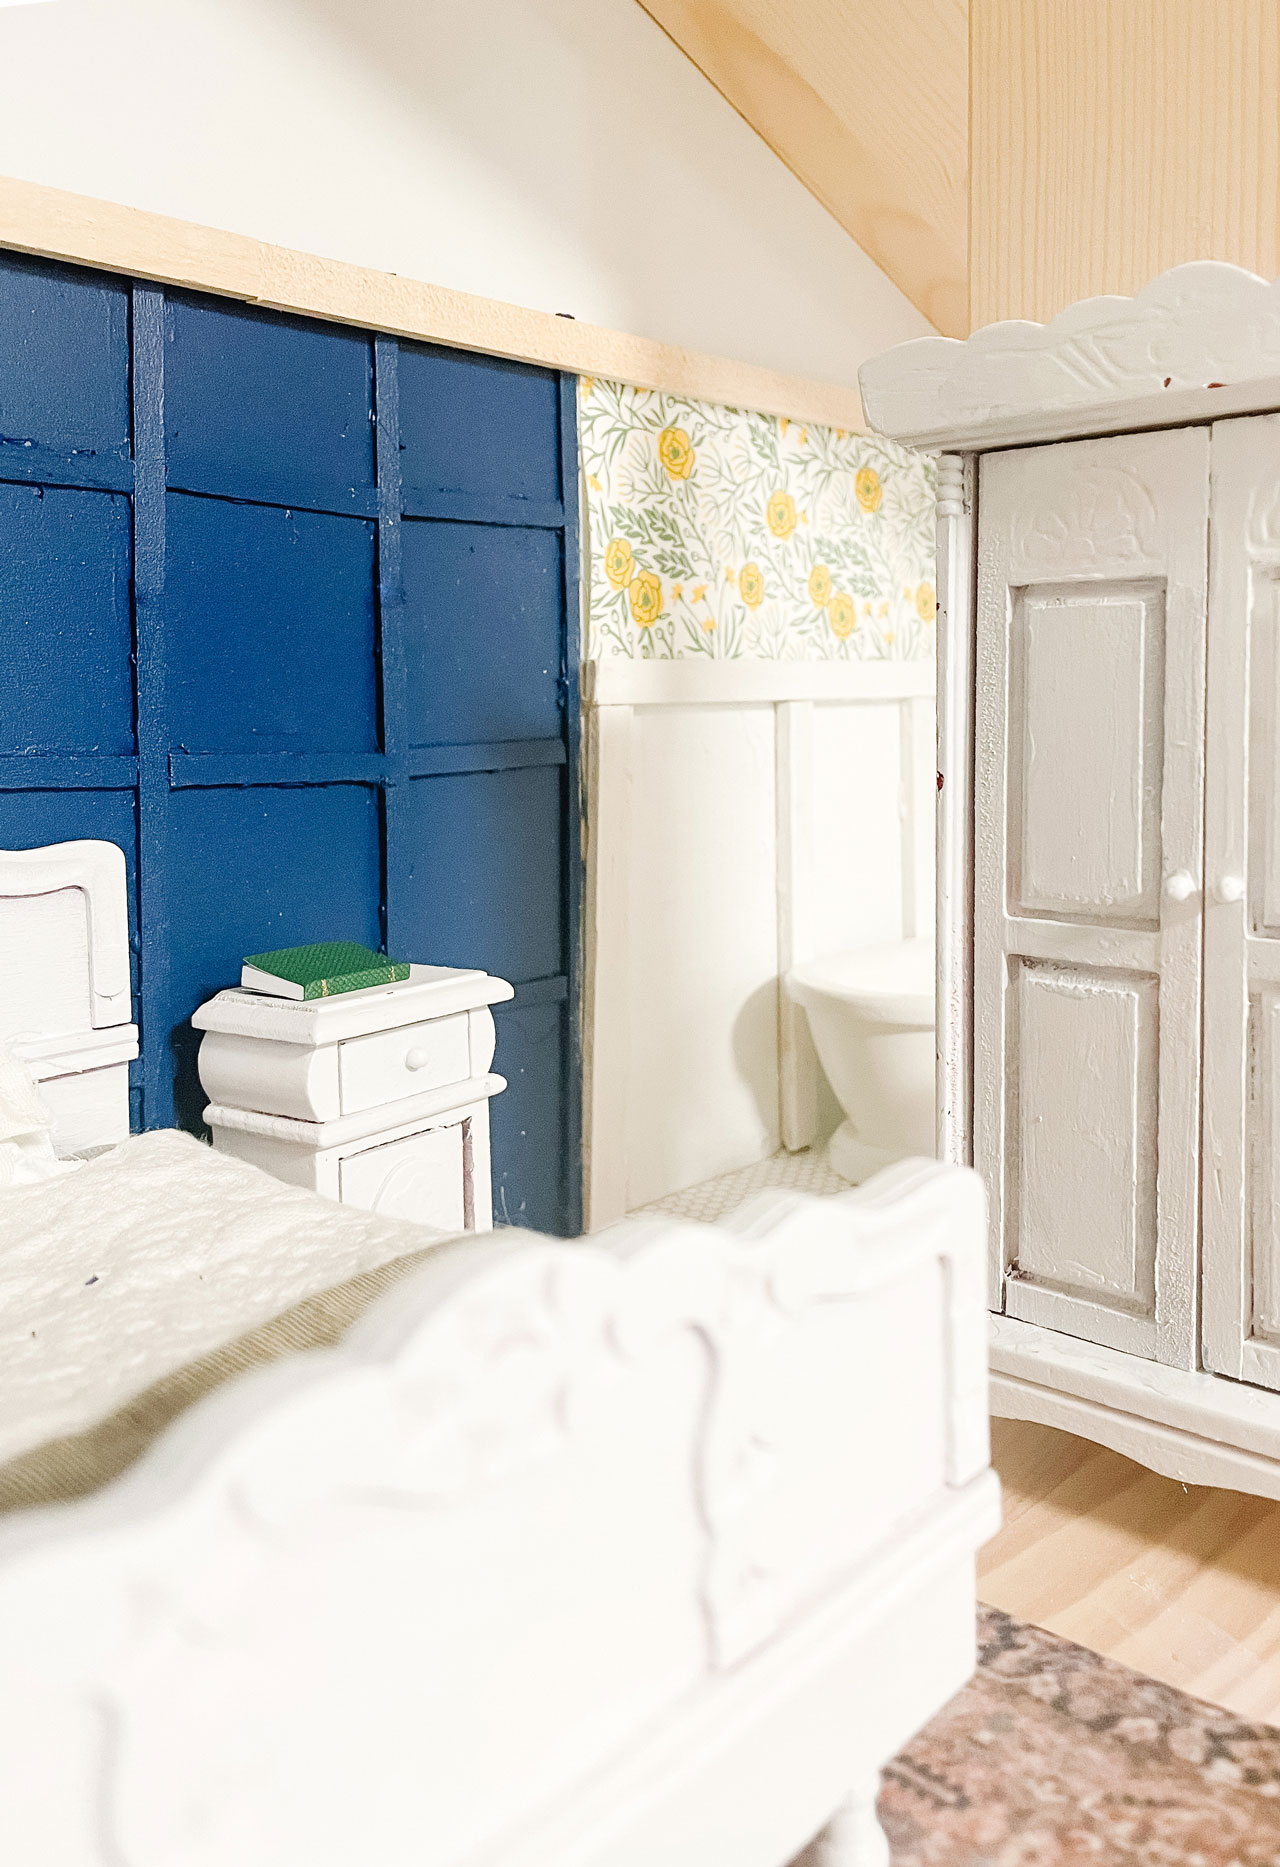
But that paneling make it look so good, am I right? Very fancy. I wish I had the energy to do that in our room, but alas, I am far to lazy, so I’ll live vicariously through the dollhouse master bedroom (with an en suite bath, no less… way better than my house).
Now for the source breakdown:
- Bed, Nightstands, and Armoire: Melissa and Doug set, painted white
- Linens and pillow: Scrap Fabric
- Rug: Google Image printed on velour paper
- Paneling: Balsa Wood
- Paint Color: Custom mix of leftover house paint
- Book
- Lamp: Cork top from a reed diffuser that Joey got me
- Picture Frame
- Picture: Juniper Print Shop
I had originally thought this room would be the bathroom. I staged it and ended up deciding it was better as a bedroom, but I did get a cute photo of it while it was still a bathroom.
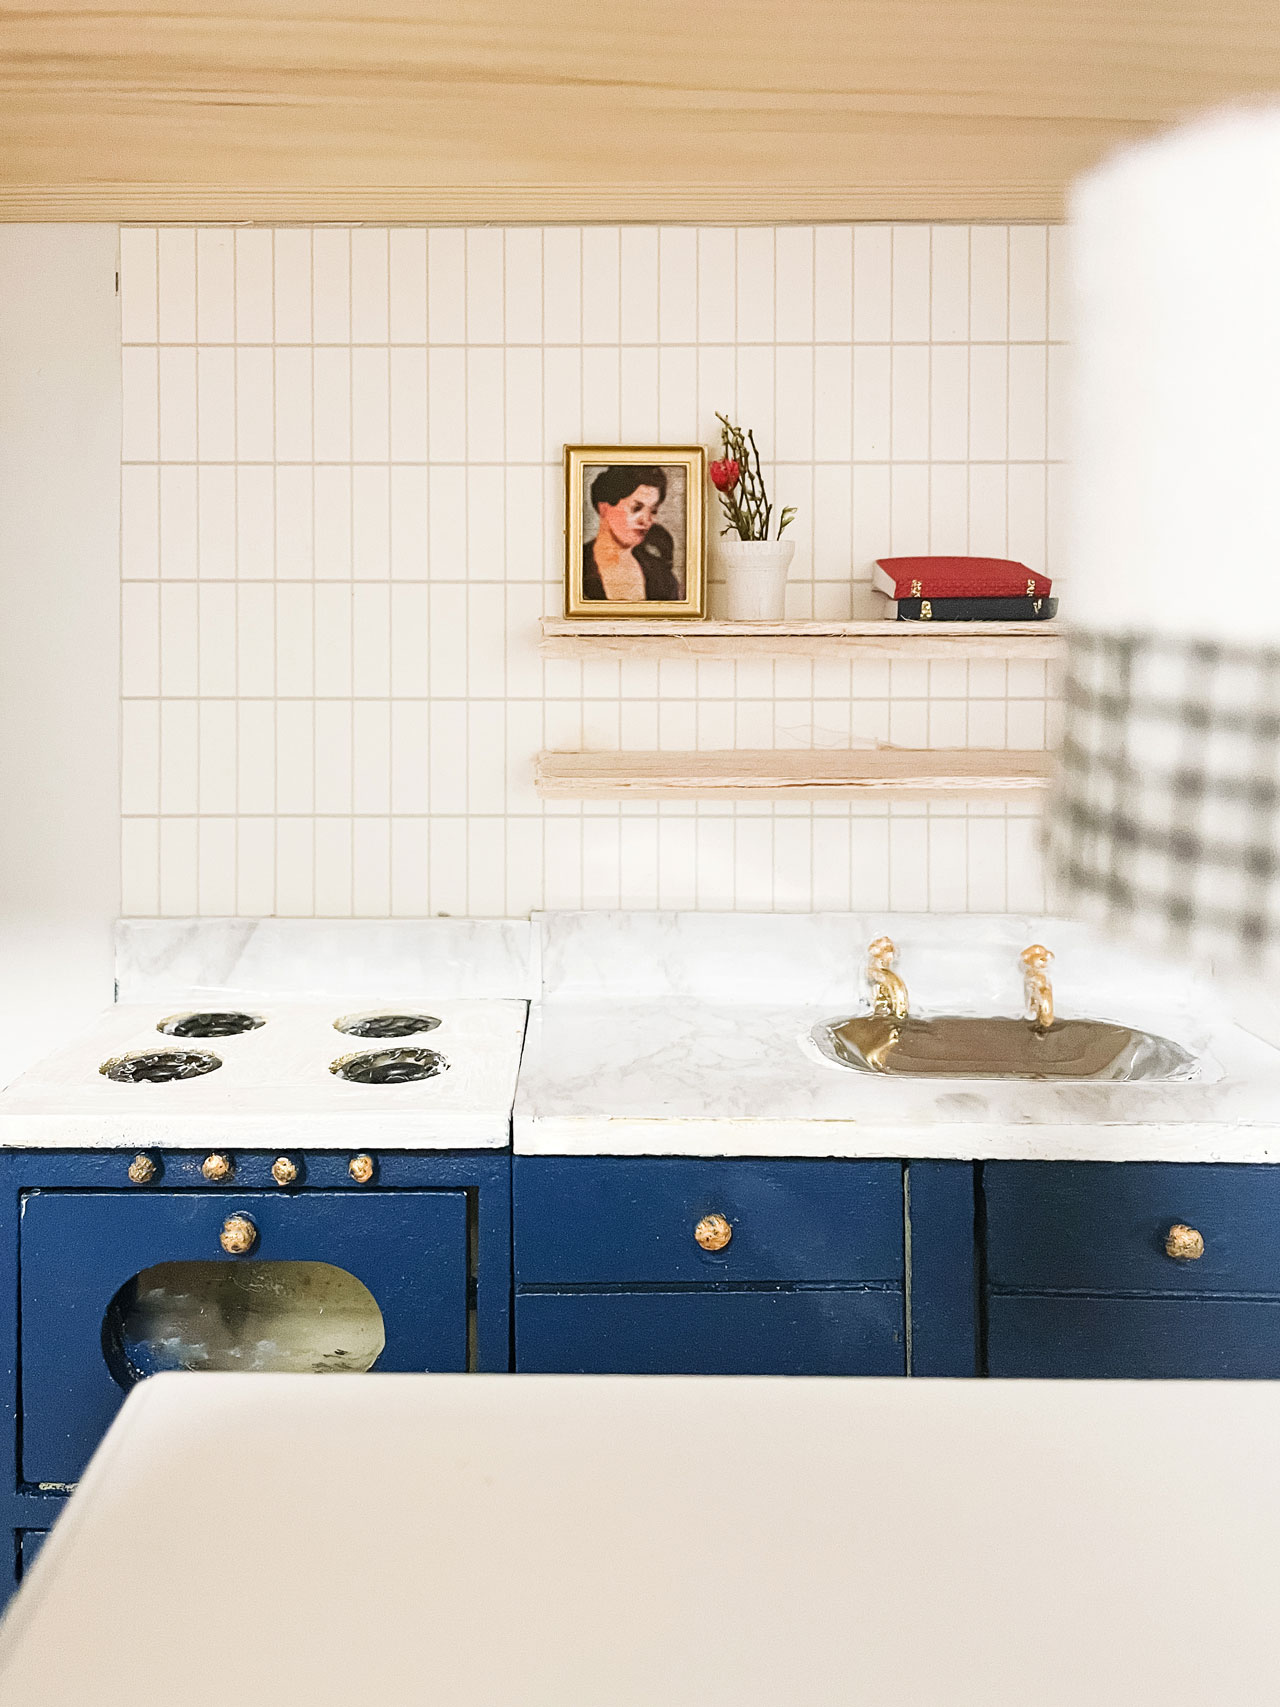
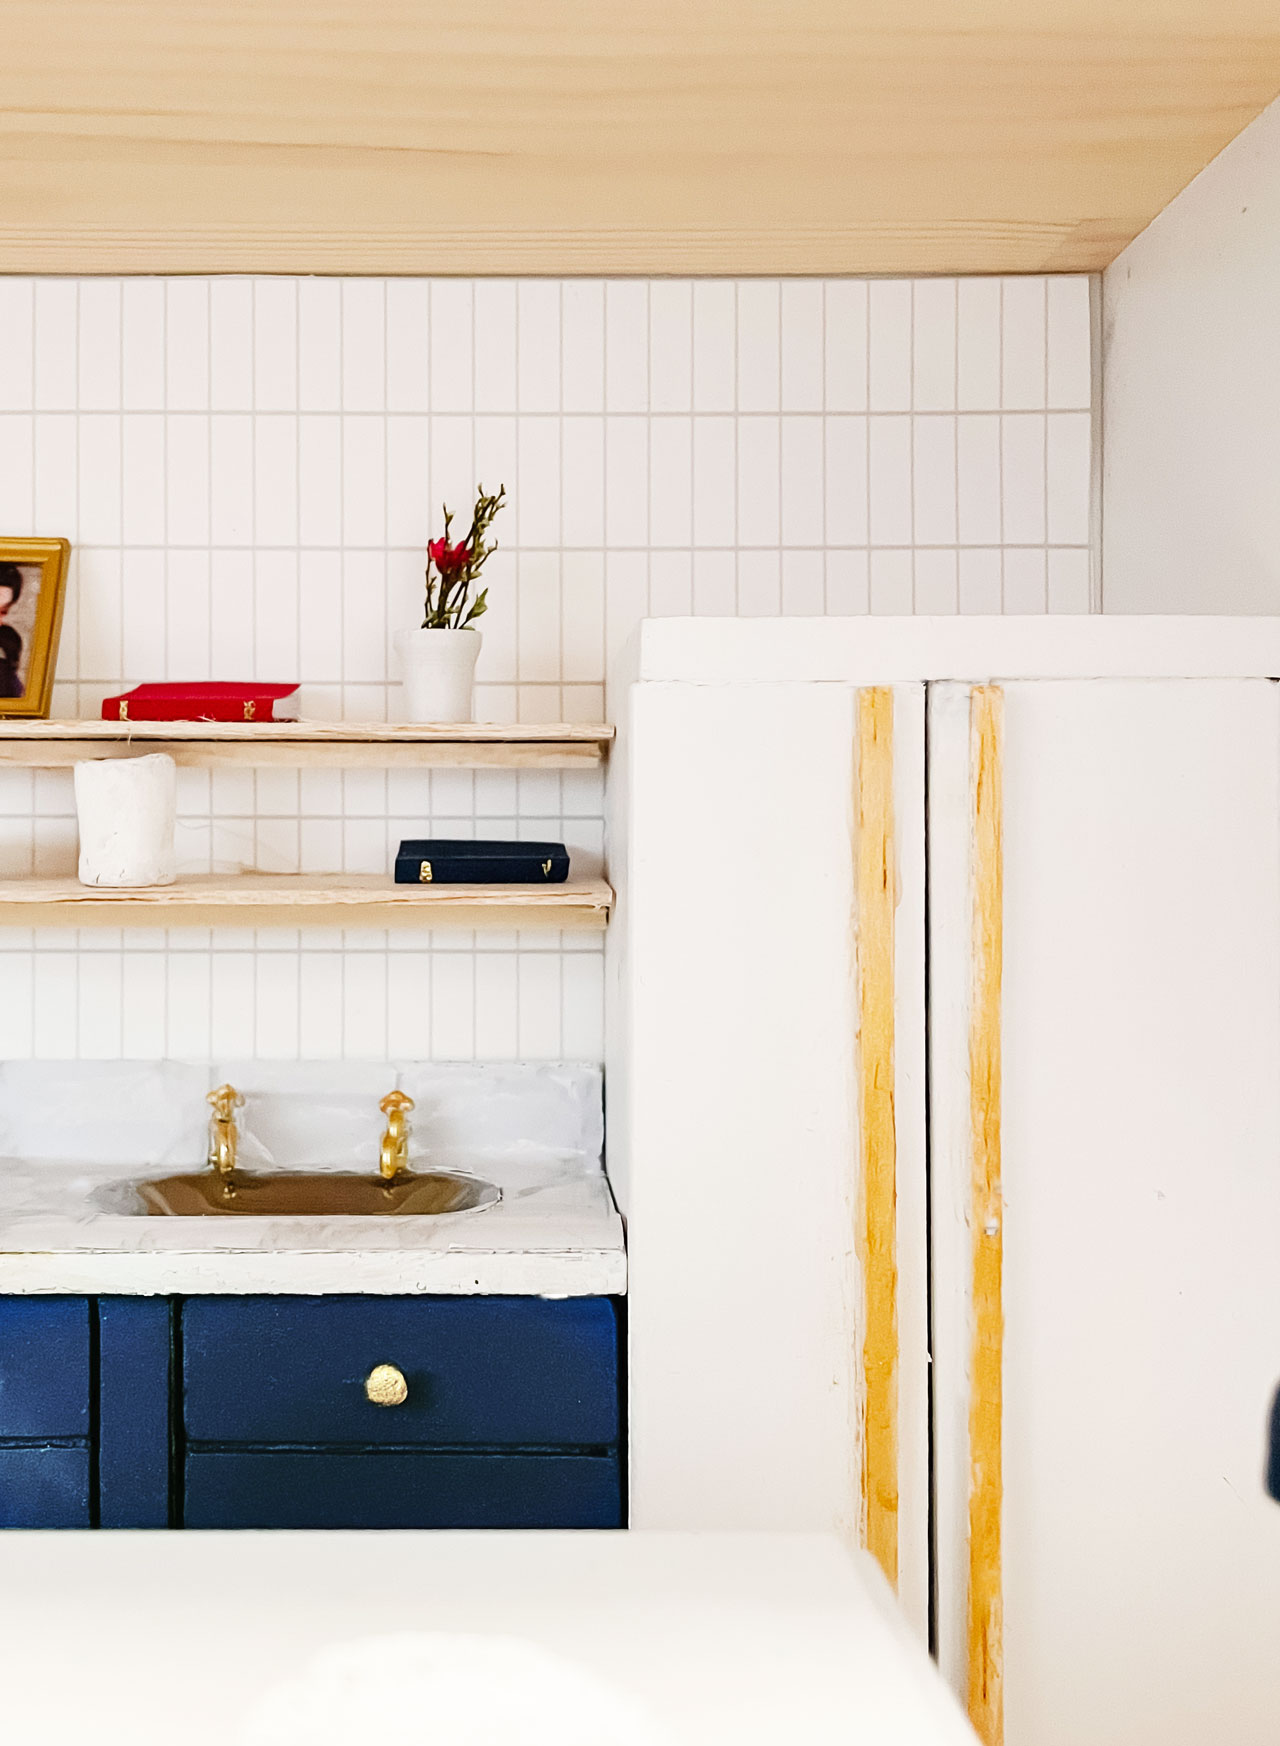
Moving on…besides the bathroom, I think the kitchen is my next favorite room. Maybe it’s because I just completed a kitchen reno in our real house (I’ll be posting about that soon). I tried to replicate the style of our kitchen, and I love how it turned out. The tile is probably my favorite part because it’s the same orientation that we used. I made it in Photoshop, similar to the flooring in the bathroom.
The source list is pretty extensive:
- Oven, Fridge, Sink, Table, and Chairs: Melissa and Doug set. I painted the fridge white and gold, the cabinets navy blue, and the table white. I covered the counters with marble contact paper.
- Books
- Mug (plates and bowls not pictured): Joey made using air clay
- Flowerpot: Michaels
- Floating Shelves: Balsa wood
- Picture Frame
- Picture: Juniper Print Shop
- Pendant: Wine Cork covered in washi tape and computer paper – it’s kind of hard to see in this photo, but you can see it more clearly in the full dollhouse image
- Tile: Custom pattern in Photoshop
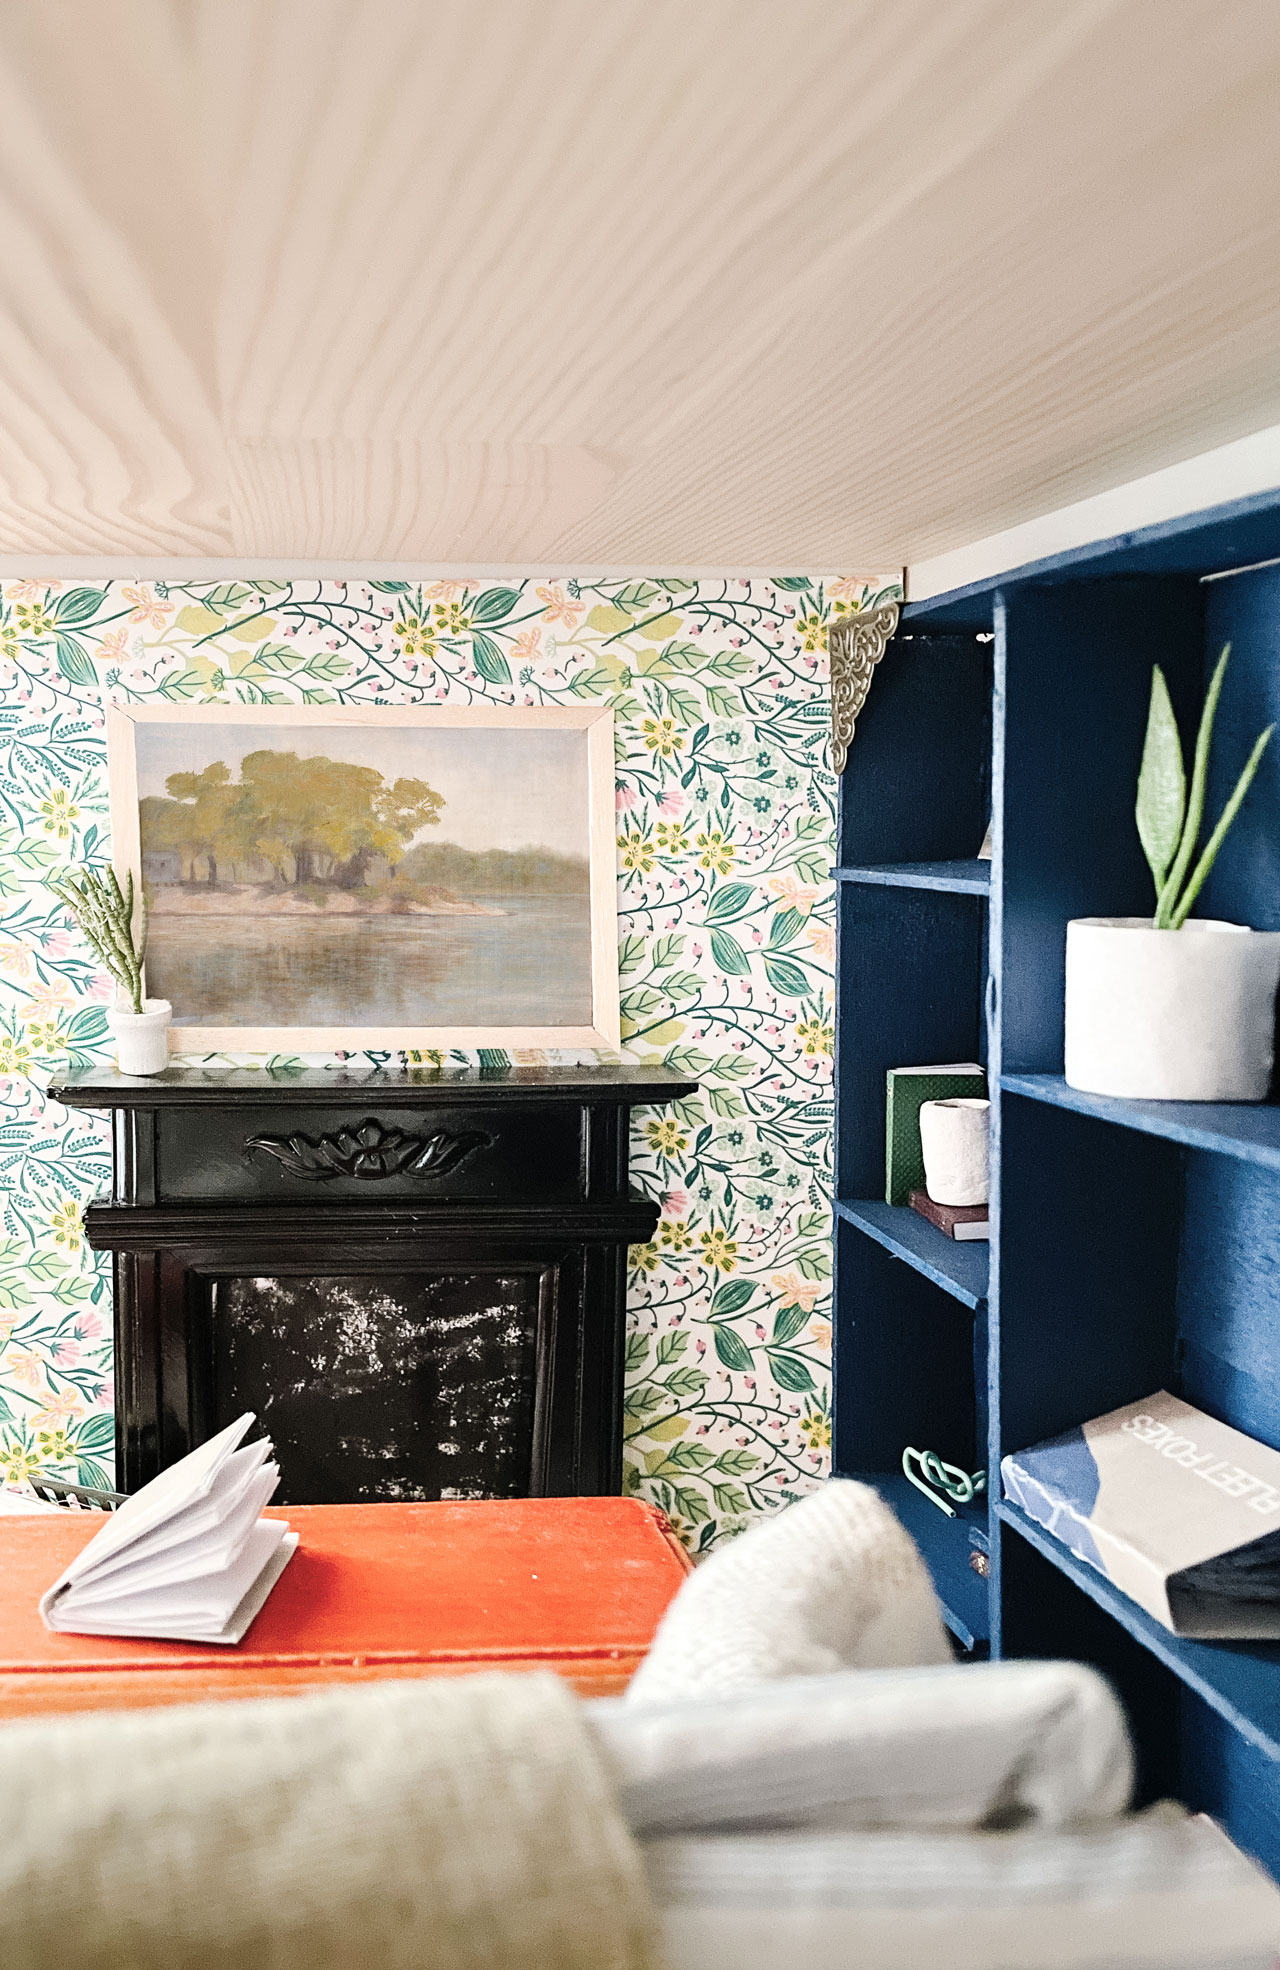
And now to the living room, which to be honest, isn’t my favorite space. I think it’s the wallpaper I chose, or maybe it’s the bookshelves, which I didn’t get to fully style out. I didn’t have enough books and ran out of time to make more. But one thing I love is the sofa, which is 100% handmade. I originally planned on using the sofa from the Melissa and Doug set, but I hated the fabric. I tried to paint it, and it turned really stiff, so I had to toss it and start fresh. I watched a bunch of youtube tutorials, and found this one to be the best. I just modified it slightly to have lower arms and I used cardboard instead of foam board. I also built a platform from balsa wood. The other thing I built in this room is the bookshelves. I used balsa wood, but my construction skills weren’t the best, so I probably should have just bought something.

Sources:
- Coffee Table: Melissa and Doug
- Books
- Coffee Table Book: Handmade from a Fleet Foxes pre-order thank you postcard
- “Frame TV”: Coffee Stirrers and image from Juniper Print Shop
- Wallpaper: Treehouse Threads free printable
- Sofa: Handmade
- Blanket and Pillow: Handmade from fabric scraps
- Fireplace
- Logs
- Planter: Cork that was covered in computer paper and a piece of artificial plant that I foraged from our living room
- Vase: Joey original using air clay
- Knot Sculpture: Paperclip
- Plant on the Fireplace: The planter is from Michael’s and I added a piece of artificial plant that I cut off of a faux plant in Florence’s room
- Rug: Google Image printed on velour paper
I think that’s it. All in, it took me a solid 16 hours I would say. I worked at night mostly, but we did have a vacation day when Florence’s school was still open, so I dropped her off at daycare and worked on it.
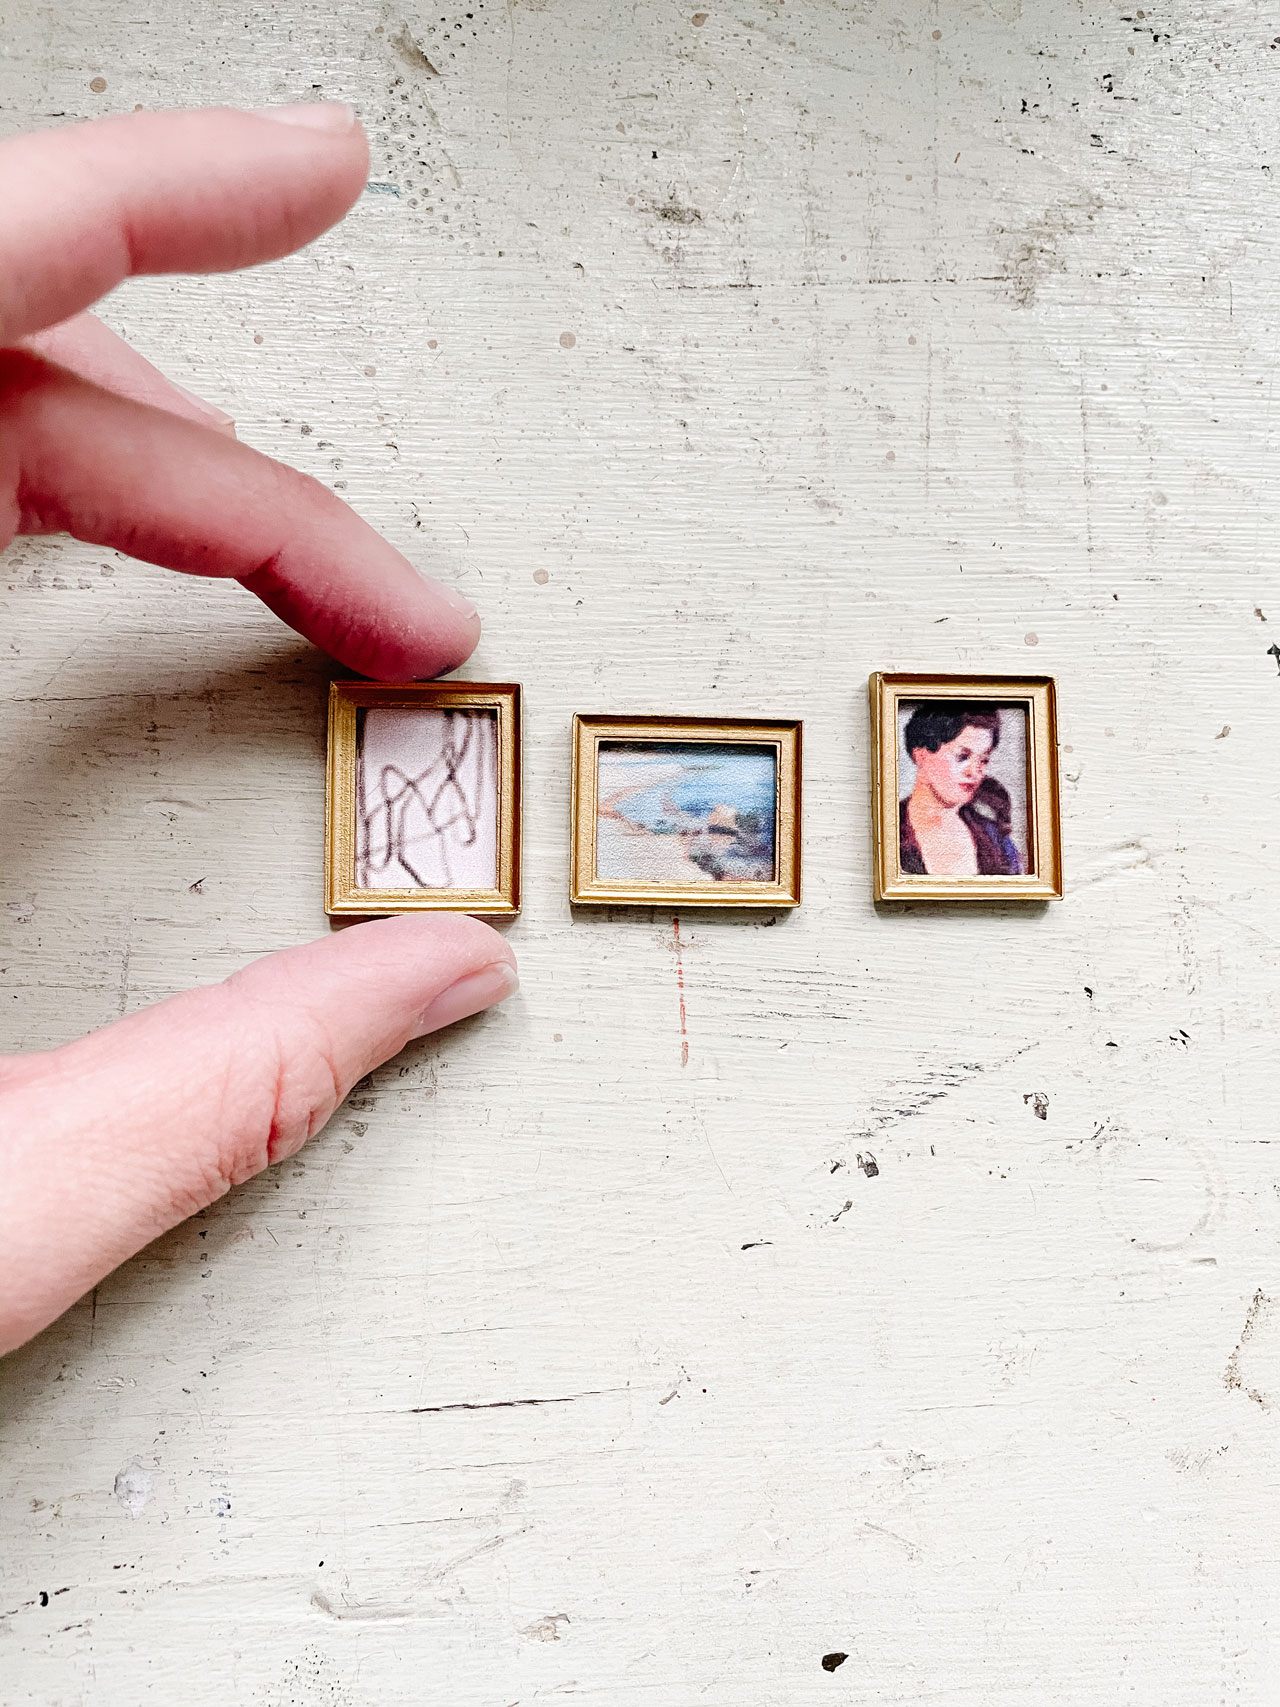
Randomly, I would say that my favorite part of the whole thing was probably the little pictures I scaled down from Juniper Print Shop. I’m obsessed with their artwork, and they even reached out on Instagram after seeing my miniatures, which was super nice.
Now everyone has been asking me what Florence thought of it when she opened it on Christmas morning… she absolutely loved it. But soon after, she began rearranging everything, which gave me a bit of a heart attack. I’m just going to have to let it go (cue the Frozen music). It’s her house now, so if she wants the kitchen table in the bathroom, that’s her decision.